<img height="1" width="1" src="https://www.facebook.com/tr?id=3990718177617800&amp;ev=PageView &amp;noscript=1">

Atmospheric Monitors May NOT Detect All Dangers

Tuesday, February 9, 2016

Readings are 20.9/0/0/0…so it must be safe for entry, right? Not necessarily!

Atmospheric Monitors May NOT Detect All Dangers

After completing an interesting confined space standby job for Roco, I wanted to caution rescuers about the possibilities of atmospheric hazards within a confined space – despite what the atmospheric monitor says!

For this particular job, the atmosphere in the workspace never varied on the 4-gas monitor readings. The readings were consistently 20.9% for O2; 0 for LEL; 0 for H2S; and 0 for CO. However, this entry required the use of air-purifying respirators even though there were no visible signs of anything unusual – no odor, no product warning signs, no indication that there may be an inhalation hazard in the space.

This particular space was located at a public water facility. It was a 70-ft. deep concrete metering pit with six consecutive 12-ft x10-ft levels. It had concrete floors and walls with a vertical ladder that accessed each level. Although the space was not designed to store any product, in this case, we still had an atmospheric hazard.

Atmospheric Monitors May NOT Detect All Dangers
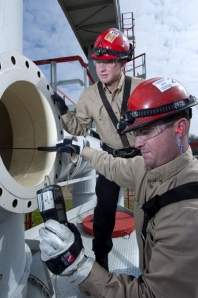
The purpose of the entry was for remediation of mercury contamination on the concrete surface. The gross cleanup of liquid mercury had been performed years prior, but further action was required to eliminate vapor hazards still present in the lower chambers.

During the first phases of the entry, vapor levels that exceeded 40,000 ng/m3 (nano-grams per cubic meter) were detected. The more frequently updated ACGIH Threshold Limit Value is only 25,000 ng/m3. The work environment in this space routinely approached twice this level, even though there were no visible signs of liquid mercury. The source of the toxic atmospheric hazard was invisible and odorless – mercury vaporizing from the concrete surfaces.

Mercury is only one example of a toxicant that can produce a hazardous atmosphere in confined spaces that will not be indicated on a typical 4-gas meter or atmospheric monitor. Many rescuers assume that their 4-gas meter will detect all atmospheric conditions that may present a risk to their health or safety, but this is just not true. There are a wide variety of agents or toxicants besides mercury that will not be detected and whose presence may require other controls or the use of respiratory protection. This mistake could be deadly, or leave rescuers with chronic health issues.

In this scenario, for example, if you were an off-site rescuer responding to the above described space in an emergency situation. Without someone on site to inform you of the possible hazard, you would have no indication that any hazards were present. Many times as municipal rescuers we respond to, shall we say, shady locations where unauthorized storage or illegal dumping of hazardous products has taken place; there are no SDS, placards, or signage. Personnel on scene may not know, or may not want to relay vital information about a space of any products within the space.

Atmospheric Monitors May NOT Detect All Dangers

Rescuers Beware: It's important to play the role of “detective” when planning or preparing to make a confined space entry.

Oftentimes, there are placards or signs on tanks or storage containers to start the investigation into what hazards may be present – and SDS for additional information. However, as rescuers, we often fall into a state of “false security” with our 4-gas meter readings.

While much of our training may include “Go/No Go” scenarios for rescue teams, the use of respiratory protection is usually based on one of the “Big 4” readings on our atmospheric monitors. Unfortunately, this may only serve to reinforce the notion that a 4-gas monitor will always provide the “complete” information of what may be going on inside a confined space. We get dependent on these monitors to tell us if it’s safe to enter without respiratory protection – and there may be much more to the story!

OSHA’s Respiratory Standard [1910.134 (d)(1)(III)] specifies "Where the employer cannot identify or reasonably estimate the employee exposure, the employer shall consider the atmosphere to be IDLH.” 

In the above statement, if you substitute Team Leader for “employer” and “Rescue Team” for employee, you may find that you cannot “identify or reasonably estimate the employee exposure.” Therefore, rescuers would need to use SCBA/SAR and other PPE until you can completely identify what hazards are in the space even though typical monitoring devices are telling us that all is well.

Atmospheric Monitors May NOT Detect All Dangers

While your standard 4-gas meter is an important screening tool – it is NOT a "catch all" for every atmospheric hazard.

Remember that NIOSH statistics indicate that 40%-60% of confined space entry fatalities are (would-be) rescuers, including both dedicated on-site standby teams and off-site professional rescuers (municipalities) who attempt to perform confined space rescues.

But let’s take this a step further. If you ask most rescuers at what O2 level does an atmosphere become dangerous, they will say below 19.5%. I know from my initial hazmat/confined space training on 4-gas monitors included oxygen displacement. It was so elegantly described to me as “if your monitor shows a decrease in oxygen, it is telling you that something else has pushed out that percentage of oxygen and replaced it with some other agent.” Now, it would be up to you to figure out what else is in the air.

For example, normal breathing air is 20.9%. To get a reading of 19.5% means that about 1.4% of “something else” has displaced the oxygen. Then, depending on what that “something else” is, could require the use of respiratory protection. Hey, wait, the good news keeps coming, and I am getting in way over my head on this science stuff, but my high school chemistry teacher should still be proud. Ambient air is made up of about 79% nitrogen and other gases and 21% oxygen. So, using fingers and toes mathematics, that equals about a 4:1 ratio of nitrogen to oxygen.

In other words, if we have a 1% displacement of oxygen from the breathing air, it will be accompanied by about a 4% displacement of nitrogen (both gases displace at about the same rate). Therefore, instead of it being about a 1.4% percent of an unknown product in our breathing air, it could be as much as 5.6% or more! And, depending on what that product is, it could already be at its IDLH level.


Project Scientist Spencer Pizzani of Weston Solutions provides this insight.

"While many rescuers are habituated to only watch oxygen (O2) percent composition, this can be deceptive. The OSHA standard for O2 concentration is based on standard temperatures and pressures at sea level. When an environment presents lower pressure (such as at higher altitudes or in chambers subject to continuous air evacuation), the partial pressure of O2 is decreased as described by the Ideal Gas Law. This can lead to 'normal’ concentrations, but with less oxygen available for respiration.

A widely used example demonstrates that the partial pressure of oxygen in a confined space at high altitudes such as in mountainous areas would be the equivalent partial pressure of 14-15% oxygen at sea level. This can be low enough for the leading effects of asphyxiation to manifest – a problem exacerbated by the high oxygen demand of strenuous rescue work.

Gases that displace oxygen can have a similar effect. A typical 4-gas meter will only read oxygen concentration. This neglects the largest component of ambient air – nitrogen. The portion of air normally occupied by nitrogen is also replaced by another gas. When taken as a whole, the contaminant gasses may exceed levels and require the use of respiratory protection, with no indication from the typical 4-gas meter. Many toxic gases are odorless and colorless. Radiation can be a similar risk. While some types of radiation can be filtered or excluded with the use of respiratory protection, exposure to other types are simply a function of time, distance and shielding. Rescuers entering confined spaces may have a strict time limit for operations as established by a health physicist. In such cases, a 4-gas meter would be entirely unresponsive even in the presence of an instantly lethal radiation exposure vector.”

Pizzani advises,

“Rescuers responding to an emergency always need to look at the big picture and be part detective in identifying potential hazards that may impact both initial and rescue entry. Identification of past residues in storage containers, examination of process system SDS, and any information/knowledge provided by workers familiar with the space or process is invaluable. Warning signs such as odors, visible dust, or any variability on oxygen concentration should be met with a thorough set of instrument diagnostics and further investigation.”


Summary

A standard 4-gas meter is an important screening tool for atmospheric acceptability. However, it is "not a catch all" for every atmospheric hazard. Developing a detailed preplan; identifying possible hazards; and proper PPE should be the top priority of anyone planning a rescue entry. The use of supplied air systems (SAR/SCBA) should be considered “minimum protection” for rescuers until an atmosphere is completely characterized or in the event of an unknown agent or condition. Remember, a standard 4-gas meter may not be telling the whole story.

Special thanks to contributing author, Spencer Pizzani, who is an Industrial Hygienist and Project Scientist for Weston Solutions, Inc. Weston is a global environmental consulting firm specializing in environmental solutions, specialty construction and green development.

Roco Rescue CS Attendant Requirements

Additional Resources


Roco QUICK DRILL #10 - Tripod Quick Drill

Monday, February 8, 2016

Roco QUICK DRILL #10 - Tripod Quick Drill
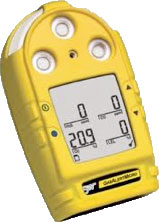
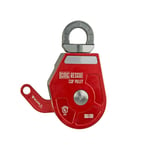
Rescue tripods provide a mobile and rapidly deployable high-point anchor option for confined space emergencies. Like any piece of equipment, however, it has its limitations. It is important that your team becomes proficient with this tool in training to ensure fluid deployment during a live rescue. 

There are two primary topics to review regarding rescue tripod operations: Set-Up and Rigging. Here’s a quick drill to help you and your team become more proficient in its use.

Set-Up

1. Find an area to review your tripod operations. Ideally, train over a potential rescue space, keeping in mind safety around any open spaces. As with any training exercise, always use proper PPE and take proper fall protection precautions. If you don’t have access to potential spaces or are training in a municipal environment, improvise with a closed street manhole or create a mock-up opening with wood or cardboard.

2. Deploy your tripod. While you are deploying it, discuss the following with your team:

a. When do you setup the tripod in a rescue operation? Prior to rescuer entry? During packaging stage? During extrication stage?

b. Do we setup the tripod over the space or in a safe area, then move the tripod over the space?

c. What type of patient packaging will be done and at what height will the tripod need to be in order to clear packaging out of space?

d. Tripod strengths at different height settings. Is height more important or strength?

e. Can the legs of the tripod be different lengths or rest on different elevated surfaces?

f. Should the tripod be tied down so it won’t tip?

g. Keeping resultant forces within the legs of the tripod to prevent tipping.

h. Insure correct assembly, including the use of the tripod’s chain to prevent overspreading the legs of the tripod.

Now that your tripod is assembled, move on to rigging.

Rigging

Rig each of the following systems and raise and lower a load/weight. This shows the pros and cons of operating each system. Show how the resultant forces can be applied by the haul position or by patient movement outside the tripod footprint. In most cases, there are three rigging options for tripod operations. Rig each, while discussing each method’s strengths and weaknesses.

1. Block and Tackle System

a. Often pre-rigged and therefore rapid to deploy.

b. Will the length of the collapsed system create height constraints to remove the victim from the space?

c. Does the height of the tripod create any issues operating the cam of the system?

d. Rope length vs depth of space; what strength M/A will you be able to build?

e. Can the haul team keep resultant haul forces within the legs or footprint of the tripod to prevent tipping, or do we need to have a change of direction pulley?

2. Single Main Line with COD (change of direction) within the Tripod’s Footprint

a. Better option when the tripod’s height and victim clearance are concerns.

b. Enables the lower/haul team to operate remote of the space.

c. Necessitates an anchor point within the tripod’s footprint and an anchor point for the main line.

d. Allows for reaching greater depths than a block and tackle system.

e. Single line entering the space and allows for attachment of patient air bottle.

f.  Takes more time to rig.

3. Pass-Through Method

a. A solution when the block and tackle or single main line techniques will not work (no anchor point within footprint of tripod available).

b. Increased Mechanical Advantage (6x1).

c. Requires two remote in-line anchor points on opposite sides of the space.

d. Two traveling lines in the space.

e. Eliminates concerns with haul-resultant forces.

f. Most complicated of the three systems.

A properly deployed rescue tripod can be a game changer for a confined space rescue. As with any piece of equipment, continuous training with the device and its associated techniques is necessary to maintain “proficiency,” which translates into safety and efficiency! Always, train hard so that your team will perform when the call comes!


Next in this series: QUICK DRILL #11 - Patient Packaging (Single Rescuer)

QuickDrill11


Service Life Guidelines for Rescue Equipment

Wednesday, January 20, 2016

Service Life Guidelines for Rescue EquipmentDepending on the manufacturer, you will find varying specifications for the service life of rescue equipment. For example, Petzl specifically defines the “potential” service life of plastic or textile products to be no longer than 10 years. It states "indefinite" for metallic products. CMC, on the other hand, does not give specified times for their equipment stating, “The service life of equipment used for rescue depends greatly on the type of use and the environment of use. Because these factors vary greatly, a precise service life of the equipment cannot be provided.” However, in reference to harnesses, CMC cites ASTM F1740-96 as the industry standard for service life. SMC follows along the lines of CMC when stating the amount of time a product can stay in service.

Although the definition of “equipment lifespan” is very broad depending on the manufacturer, each will provide specific instructions on proper inspection of equipment and detailed explanations on when to retire the item.

Most manufacturers follow the same general guidelines for removing equipment from service. Several general identifiers that pertain to all equipment are shown below.

Download Gear Inspection Checklist (PDF)


REASONS FOR EQUIPMENT RETIREMENT INCLUDE:

Service Life Guidelines for Rescue Equipment
  • Item fails to pass any pre/post use or competent person inspection.
  • Item has been subjected to a major fall or load.
  • Item is constructed of plastic or textile material and is older than 10 years.
  • You cannot determine the complete full-use history of item.
  • You are not certain or have lost confidence in the equipment.

Most manufacturers will provide service for equipment items that are repairable. However, most caution against this because the cost of repair typically exceeds the cost of replacement. Any repairs attempted outside of the manufacturer may void any warranty and will release the manufacturer from any liability or responsibility. In addition, all manufacturers recommend destroying equipment once it has been retired from service to prevent items from inadvertently being recycled back into active service gear.

Regardless of the stated service life, the condition of equipment–as determined through inspection by a qualified party – is a key factor in determining whether or not a piece of equipment is fit for service.

Manufacturers also provide indicators for different types of equipment that require it to be retired from service. These are not only capturing the general conditions mentioned above, but also bring in conditions that are specific to each category of equipment. It is important to identify these specific conditions as they are vital to the dependability and functionality of each component.

Harnesses:

Harnesses are one of the most vital components of life safety equipment. Without a certified harness in serviceable condition, the best life safety rope and hardware in pristine condition will do little to protect the user. All individuals who are required to wear harnesses to perform duties should be trained and authorized in the inspection process. Harnesses should be inspected before and after use as well as once annually by an individual deemed a competent person by the facility or department.

Since harnesses are a nylon product, they fall under the guidelines set forth by ASTM consensus standard F1740-96 and have a service life of 10 years. Manufacturers also state that hard or excessive use – as well as the conditions when a harness is used – may significantly reduce its service life. It is important to conduct routine inspections as well as keep records of harness use. This “usage” history could indicate signs that would require the equipment to be retired early.

Here are some conditions to help identify when it’s time to retire your life safety harness:

Service Life Guidelines for Rescue Equipment
  • The harness has surpassed 10 years since the manufacture date.
  • Webbing shows signs of cuts, significantly worn or frayed areas, soft or hard spots.
  • Webbing shows signs of discolored or melted fibers.
  • Stitching shows signs of pulled threads, abrasion or breaks.
  • Hardware shows signs of damage, sharp edges, excessive wear or improper function.
  • If the harness has been subjected to shock loads, fall loads, or abuse.
  • If there is any doubt about the integrity of the harness.
  • If the harness demonstrates any of these conditions, it should be removed from service and destroyed.


Life Safety Rope, Webbing, Anchor Straps, Accessory Cord:

Since these products are nylon or textile based as well, they fall under the same inspection process as harnesses. A complete inspection of life safety rope and associated products includes not only a visual inspection but a tactile (or touch) inspection as well. The tactile inspection should be done with tension on the rope, webbing or strap.

The inspector is looking to identify any of the following conditions:

Service Life Guidelines for Rescue Equipment
  • Chafed, glazed or discolored surfaces (these areas should receive a more thorough inspection).
  • Abrasions or cuts in the sheath where the core is exposed.
  • Variation of diameter of the rope that could indicate potential damage to the core fibers.
  • Soft or hard spots that could indicate core damage or that the fibers have been over stressed.
  • If the rope has been subjected to shock loads, fall loads or abuse.

If any of these conditions are noted, then the item should be retired and destroyed immediately. It is important to remember that an accurate history should be maintained for all life safety rope products. The date of manufacture should be identified and recorded as products are being put into service. Equipment inspectors or users should ensure that these products do not exceed their service life. As with harnesses, the amount, type and conditions of use can drastically reduce the service life of these products.

Carabiners:

Since carabiners are metallic, they do not fall under the ASTM service life recommendation of 10 years. As long as these products are in serviceable condition and properly maintained, they have an infinite service life. Even though they do not have a dedicated service life term, it is still important to conduct the same pre/post use and annual inspections.

Some conditions that would require the equipment, such as carabiners, to be retired from service include:

Service Life Guidelines for Rescue Equipment
  • Carabiner has been dropped a significant distance.
  • Exposed to heat sufficient enough to alter the surface appearance.
  • Cracks, distortion or deep gouges.
  • Corrosion or deep pitted rust. (Note: Surface rust may be removed with a fine abrasive cloth and coated with a preservative such as LPS #1.)
  • Sharp edges that could cause damage to life safety rope (minor edges may be smoothed with the same process as rust removal).
  • Gate does not line up when closed.
  • Gate action does not return to closed position when opened and released.
  • Locking mechanism does not fully engage.
  • Complete history of use cannot be determined.

If any of these conditions exist, the equipment should be removed from service and destroyed. Records of use and inspection should be kept on these items even though the service life of the product is infinite.

Pulleys:

Service Life Guidelines for Rescue Equipment

Pulleys, as with carabiners, are metallic in construction and do not have a service life recommendation. They will also have an infinite service life as long as they are in serviceable condition and are properly maintained. Pulleys fall under the same inspection requirements as carabiners. 

Below are some conditions that would require such equipment to be removed from service:

  • Pulley has been dropped a significant distance.
  • Exposed to heat sufficient enough to alter the surface appearance.
  • Cracks, dents or elongation at the carabiner hole on side plates.
  • Corrosion or deep pitted rust. (Note: Surface rust may be removed with a fine abrasive cloth and coated with a preservative such as LPS #1.)
  • Deep scratches or gouges to side plates or sheave(s).
  • Sharp edges that could cause damage to life safety rope (minor edges may be smoothed with the same process as rust removal).
  • Side plates that do not line up at the carabiner hole.
  • Elongation of the side plates at the sheave pin.
  • Side plates that do not move freely.
  • Sheave does not turn freely or significantly rubs against side plate.
  • If the item has been subjected to shock loads, fall loads or abuse.
  • If the history of use or manufacture date cannot be determined.

If any of these conditions exist, the equipment should be removed from service and destroyed. Records of use and inspection should be kept on these items even though the service life of the product is infinite.

Descent control devices:

Descent control devices, if metallic, do not have a service life recommendation. If the device is constructed of plastic or other textile material, it will have a service life not to exceed 10 years.

conditions that would require this equipment to be removed from service:

Service Life Guidelines for Rescue Equipment
  • Cracks, deformations or elongation to any portion of the device.
  • Corrosion or deep pitted rust. (Note: Surface rust may be removed with a fine abrasive cloth and coated with a preservative such as LPS #1.)
  • Deep scratches or gouges to any portion of the device.
  • Sharp edges that could cause damage to life safety rope (minor edges may be smoothed with the same process as rust removal).
  • Excessive wear to friction surfaces or cam (see wear indicator on some devices).
  • If the device has been subjected to shock loads, fall loads or abuse.
  • If the history of use or manufacture date cannot be determined.

If any of these conditions exist, the equipment should be removed from service and destroyed. Records of use and inspection should be kept on these items throughout their service life.

Ascenders:

As with previously mentioned equipment, the same inspection procedures apply to ascenders. 

 remove from service if you find:

Service Life Guidelines for Rescue Equipment
  • Cracks, deformations or elongation to any portion of the device.
  • Corrosion or deep pitted rust. (Note: Surface rust may be removed with a fine abrasive cloth and coated with a preservative such as LPS #1.)
  • Deep scratches or gouges to any portion of the device.
  • Sharp edges that could cause damage to life safety rope (minor edges may be smoothed with the same process as rust removal).
  • Fouled teeth on cam (handled type ascenders).
  • Excessive wear to surface of cam.
  • Damage to rivets (if applicable).

If any of these conditions exist, the equipment should be removed from service and destroyed. Records of use and inspection should be kept on these items throughout their service life.

Service history is an extremely important part of ensuring life safety equipment is properly maintained and that service life is not exceeded. Not only does this help rescue teams control inventory and operational capability of equipment by documenting each use and inspection, it also assists the teams in forecasting budget costs for the replacement of items that are nearing the end of their service life.

Maintaining records of the manufacturer’s information received when purchasing new equipment is vital to identifying and keeping track of the manufacture date. It is also important to keep this information on file for the exact procedures for inspecting and removing equipment from service. If the manufacture date of equipment, such as life safety rope and harnesses, cannot be identified; it poses extreme liability for agencies or facilities whose teams may potentially be operating with equipment that has passed its service life. It could also create a compromise in the safe operation of the equipment. Also, if record-keeping of equipment inspection and use is not a primary focus, it could potentially expose team members to operating with unsafe equipment due to abuse or excessive/extreme conditions that go undetected.

All team members should be qualified and knowledgeable enough to perform pre- and post-use inspections of equipment. It is crucial that all members document each use of equipment, denote any deficiencies, and report to the proper person. One person should be designated to perform the competent person annual inspection. This person should have complete knowledge of the equipment and inspection procedures as well as the authority to keep or remove equipment from service as they see fit. If team members are unable to fill this role, a qualified third party with applicable manufacturer certifications in competent person inspection should be brought in to assist in determining the condition and estimated service life of rescue equipment. For assistance from our rescue equipment professionals, call us at 800-647-7626.


Additional Resources

gear-checklist

Gear Inspection Checklist (download)

Cleaning Your Rope…Here’s What the Experts Have to Say

Guidelines for Permanent Marking of Rescue Hardware


NFPA Issues New Guide for Confined Spaces

Thursday, January 7, 2016
“Up until NFPA Issues New Guide for Confined Spacesnow, requesting or researching OSHA Letters of Interpretation or checking with other safety professionals was the means to get a clearer picture of ‘how’ to accomplish safe and compliant confined space entry. NFPA's Guide for Safe Confined Space Entry (NFPA350) helps to bridge that area from regulation to compliance. It is a ‘must have’ resource for safety professionals, confined space owners/workers and rescuers as well,”  states, Dennis O'Connell, Director of Training for Roco Rescue, who served as an alternate committee member for NFPA 350.

Here's more from NFPA on their new guide...

Every year, confined space incidents result in worker deaths, injuries, and serious illnesses. The danger is widespread because all facilities can have confined spaces - from commercial buildings and hospitals to public works, utilities, and chemical/industrial facilities. By U.S. law, employees must comply with applicable regulations such as OSHA's 29 CFR 1910.146 and 29 CFR 1926 Subpart AA to ensure personnel safety. However, these regulations tell you 'what' to do, not 'how' to identify, evaluate, and control confined space hazards or conduct rescue response.

NFPA has just introduced NFPA 350: Guide for Safe Confined Space Entry and Work. This all-new guide is essential for anyone who enters confined spaces, along with facility managers, code officials, and safety personnel. NFPA 350 explains how to protect workers who enter into confined spaces for inspection or testing, or to perform associated work. Provisions address the full range of special hazards, including those present in water treatment, petrochemical, and agricultural facilities. It provides information to assist companies that need to comply with OSHA's Permit-Rquired Confined Spaces (29 CFR 1910.146) among other standards. In addition, NFPA 350 helps fire service and emergency services personnel develop and evaluate plans for confined space rescue in conjunction with NFPA 1670: Standard on Operations and Training for Technical Search and Rescue Incidents.

This guide will help you be prepared to recognize, evaluate, and control confined space entry hazards. Follow practices developed by experts for: 

    • • Identification of Confined Spaces
    • • Evaluation of Hazards
    • • Atmospheric Monitoring
    • • Hazard Elimination and Control
    • • Ventilation
    • • Rescue and Rescue Planning
    • • Confined Space Personnel Duties, Responsibilities, and Competencies
    • • Pre-Entry Evaluation Forms and Permits
    • • Management of Change
    • • Prevention Through Design
    • • OSHA Alternate Entry Procedures and Reclassification (Annex C)

As an added note, NFPA 350 looks at all confined spaces from a different prospective- i.e., all spaces are treated as "permit required" until it is proven that entry is safe or the proper precautions have been taken. This guide's impact in confined space work and rescue will be significant in reducing risk and meeting compliance issues. For more information, visit NFPA.org.

Gravedigger Engulfed In Cave-in of Unguarded Grave

Monday, January 4, 2016
Gravedigger Engulfed In Cave-in of Unguarded Grave“A Trench is a Trench is a Trench”

An employee of a cemetery in Farmingdale, New York, was seriously injured on May 7, 2015, when the walls of the grave opening in which he was working collapsed and buried him up to his waist.

An inspection by the Long Island Area Office of the U.S. Department of Labor’s Occupational Safety and Health Administration found that the excavation and its support systems lacked adequate protection against cave-ins and the excavation had not been inspected to identify such deficiencies. Other hazards included damaged equipment and the placement of excavated soil on the edge of the unprotected trench. These conditions exposed employees to the hazards of cave-in, engulfment and struck-by injuries.

This worker literally came close to an early grave because the cemetery failed to provide proper excavation protections. 

“This cave-in could have been prevented if proper and legally required trenching safety procedures had been followed by the employer,” said Anthony Ciuffo, OSHA’s Long island (NY) area director. “It is imperative that cemeteries ensure that workers at all its cemeteries are protected against cave-in hazards and ensure that an incident such as this does not happen again in the future.”

OSHA cited the company on Nov. 5, 2015, for two willful and three serious violations of workplace safety standards.

Roco Comments from Dennis O’Connell, Director of Training:

You may think of this is an unusual circumstance, a once in a lifetime event. Sorry, but you’re wrong. During my tenure as a rescuer in NYC, I responded to a number of these jobs, and they present some additional hazards that are not associated with most trench rescue jobs.

You can call it what you want, but a grave is a trench. And the location can make a big difference in terms of hazards presented. For example, I have a house in NY and one in Louisiana – in South Louisiana, we try to bury people above ground, if possible! However, in places like NY, cemetery space is so limited. It’s like high-rises in the city, our cemetery family plots bury multiple family members usually 3 on top of the other, which is referred to as a triple depth grave. This pushes the grave depth to about 8 feet for the first entombment.

So, no matter what you call it – a trench is a trench, and we need to follow OSHA 1926.651-652 requirements for protecting workers. Let’s look at some of the grave/trench basics before we move on to the specific grave hazard. If we dig an excavation that is longer than it is wide, it is a considered a trench – if it is 4’ or deeper, you need to have a ladder or other means of egress for workers; if it is 5’ or deeper, you need to install a protective system.

You must have a Competent Person, as defined by OSHA, to determine what system is adequate and that it is installed properly. They must also inspect the trench and surrounding area for hazards before workers can enter the trench. Of course, there’s a lot more to digging a trench and the responsibilities of the competent person but you get the idea.

Also, just because a trench is only 7’ long and 3’ wide, this does not change the rules or responsibilities associated with digging a trench. If you’re digging a trench, you need to have that competent person; you need to understand the requirements of 1926.651-652; and you need to know who will respond if you have a trench emergency. Keep in mind, most municipal departments, especially volunteer departments, do not have the training or equipment to respond to a trench collapse.

Ok, the added hazard to a grave collapse rescue is the headstone at the end of the grave – depending on the size, they can weigh over 1,000lbs. If it has fallen in the grave on top of the victim, then you will need to use technical rescue techniques and equipment to lift and free the victim. If it is still on the edge, you will need to support, stabilize or remove it before rescuers can work under it. So, even an innocent grave, can be the scene of a complicated technical trench rescue.

Bottom line… if you are digging trenches for whatever reason, or you have contractors digging trenches on your property, you need to be aware of the requirements of 1926.651-652, have a “competent person,” and identify who you are going to call if a collapse happens.

FYI, you need to have 2.9 feet of soil above the casket top. Some say that it’s a public health law. Between you and me, I think it’s to keep Zombies from escaping!

Here is an OSHA fact sheet to help you better understand some of the requirements. OSHA Fact Sheet - Trenching and Excavation Safety

RescueTalk™ (RocoRescue.com) has been created as a free resource for sharing insightful information, news, views and commentary for our students and others who are interested in technical rope rescue. Therefore, we make no representations as to accuracy, completeness, or suitability of any information and are not liable for any errors, omissions, or delays in this information or any losses, injuries, or damages arising from its display or use. All information is provided on an as-is basis. Users and readers are 100% responsible for their own actions in every situation. Information presented on this website in no way replaces proper training!