<img height="1" width="1" src="https://www.facebook.com/tr?id=3990718177617800&amp;ev=PageView &amp;noscript=1">

Inspection Process for Roco Training Ropes

Tuesday, August 28, 2018

Inspection Process for Roco Training RopesQuestion: We recently had a student ask how our training rope is monitored for wear and tear because of its extensive use...

Answer: Good question, and it’s a big job for us, no doubt. We’ve used and inspected a lot of rope in the past 35+ years, but this aspect of life safety can never be overlooked or taken lightly. As always, we urge everyone to carefully follow the care, use and inspection guidelines provided by their rope manufacturer. For added safety and as standard practice, we also use secondary back-up ropes and hardware in all field activities. 

Because we train thousands of students per year, we must accept the fact that there are numerous opportunities for our ropes to be exposed to wear such as being stepped on or exposed to dirt and gravel. It is for these reasons that we perform rigorous inspection of the ropes before and after use. Plus, we also conduct an annual competent person equipment inspection as recommended by NFPA.
 
As added safety, we also expect our students to do their part in monitoring the equipment during a class, and that’s why we’re glad you brought this up.
We teach and enforce rope care and inspection of all equipment, including ropes, in all of our classes. Inspections are accomplished at multiple times during any given class including during inventory. Additionally, all equipment is inspected by a Roco employee at the conclusion of each class. If there are any signs of damage or degradation that would render the rope unserviceable according to the manufacturer’s instructions for use, that rope will be taken out of service.

Of course, we’ve seen some rope damaged over the years, which is to be expected with the use our rope receives. However, to my knowledge, we’ve never had a rope failure. We’ve seen cut sheaths and sheath slippage, evidence of broken core fibers, and other damage that failed the rope inspection. But, not once, have we had a rope fail while it was being used to support a life load. The construction and the minimum breaking strength requirements of life safety rope provide a very substantial margin of safety. And, there again, we also have the redundancy of a back-up system in place.

All manufacturers of life safety rope are required by NFPA 1983 (2017 edition) to provide the following inspection criteria information in their instructions for use:

(1) Rope has not been visually damaged.
(2) Rope has not been exposed to heat, direct flame impingement, or abrasion.
(3) Rope has not been subjected to impact load.
(4) Rope has not been exposed to liquids, solids, gasses, mists, or vapors of any chemical or other material than can deteriorate rope.
(5) Rope passes inspection when inspected by a qualified person following the manufacturer’s inspection procedures both before and after each use.

The following inspection tips are provided by PMI Life Safety Rope:
Inspection Process for Roco Training Ropes

HOW TO INSPECT YOUR ROPE

LOOK AT IT.... ALL OF IT!
Start at one end and look at every inch of the rope. Watch for signs that might indicate possible damage such as discoloration, chemical odors, abrasion, cuts or nicks in the outer sheath and visible differences in the diameter of the rope in one area in relation to the rest of the rope.

WRAP IT IN SMALL LOOPS AND LOOK!
Wrap the rope around your hand to form small loops at different random points along the ropes length. Look at these small loops as you make them, the consistency of the loop should be uniform throughout. If it’s not, you might have a problem with the rope’s core.

FEEL THE ROPE!
While you are looking at every inch of the rope, run it through your bare hands and feel it for changes that might indicate damage to the core. Changes may include any inconsistencies in rope diameter, soft or “mushy” spots, or extraordinarily stiff areas.

WRITE IT ALL DOWN!
Write the results of your inspection on the Rope Log included with your rope. Be sure to include anything you found in your inspection that might be or become a concern and document other important information about the rope such as an occurrence of uncontrolled or excessive loading, rope older than 10 years, contact with harmful chemicals, and history of use.

IF IN DOUBT, THROW IT OUT!
If you are not sure about the integrity of a rope........DON’T USE IT!
Consult the manufacturer if you need help.

So, thank you again for asking about the rope used continuously in our training programs. Even with our many years of experience, we do not take rope safety margins as a license to misuse our ropes. And that is why we are diligent in caring for and inspecting all of our equipment including the ropes. 

Know When NOT to Enter a Confined Space!

Friday, August 17, 2018

Know When NOT to Enter a Confined Space!There are countless injuries and deaths across the nation when workers are not taught to recognize the inherent dangers of permit spaces. They are not trained when "not to enter" for their own safety. Many of these tragedies could be averted if workers were taught to recognize the dangers and know when NOT to enter a confined space.

While this incident happened several years ago, it emphasizes the senseless loss of life due to a lack of proper atmospheric monitoring and confined space training. Generally, the focus for training is for those who will be entering spaces to do the work. However, we also must consider those who work around confined spaces – those who may be accidentally exposed to the dangers. Making these individuals aware of the possible hazards as well as to stay clear unless they are properly trained.

Note: This case summary from the New York State Department of Health goes on to say that the DPW had a confined space training program but stopped the training after the last trainer retired.

CASE SUMMARY - TWO (2) FATALITIES
A 48-year-old male worker (Victim I) employed by the Department of Public Works (DPW) and a 51-year-old male volunteer firefighter (FF Victim II) died after entering a sewer manhole located behind the firehouse. In fact, the Fire Chief was on scene because he had been called by the DPW general foreman to unlock the firehouse and move the firetruck so it would not be blocked by the DPW utility truck working at the manhole. Another firefighter also arrived to offer assistance, he later became FF Victim II.

The manhole was 18 feet deep with an opening 24-inches in diameter (see photo above). Worker Victim I started climbing down the metal rungs on the manhole wall wearing a Tyvek suit and work boots in an attempt to clear a sewer blockage. The DPW foreman, another firefighter and FF Victim II walked over to observe. They saw Victim I lying on the manhole floor motionless. They speculated that he had slipped and fallen off the rungs and injured himself. The Fire Chief immediately called for an ambulance.

Meanwhile, FF Victim II entered the manhole to rescue Victim I without wearing respiratory protection. The other firefighter saw that FF Victim II fell off the rungs backwards while he was half way down and informed the Fire Chief. The Fire Chief immediately called for a second ambulance and summoned the FD to respond. FD responders arrived within minutes.

The Assistant Fire Chief (AFC) then donned a self-contained breathing apparatus. He could not go through the manhole opening with the air cylinder on his back. The cylinder was tied to a rope that was held by the assisting firefighters at the ground level. The AFC entered the manhole with the cylinder suspended above his head. He did not wear a lifeline although there was a tripod retrieval system. He secured FF Victim II with a rope that was attached to the tripod.

FF Victim II was successfully lifted out of the manhole. The AFC exited the manhole before a second rescuer entered the manhole and extricated Victim I in the same manner. Both victims were transported to an emergency medical center where they were pronounced dead an hour later. The cause of death for both victims was asphyxia due to low oxygen and exposure to sewer gases.
 
Contributors to the Firefighter's Death:
• Firefighters were not trained in confined space rescue procedures.
• FD confined space rescue protocol was not followed.
• Standard operating procedures (SOPs) were not established for confined space rescue.

Know When NOT to Enter a Confined Space!The DPW had developed a permit-required confined space program but stopped implementing it in 2004 when the last trained employee retired. They also had purchased a four-gas (oxygen, hydrogen sulfide, carbon monoxide and combustible gases) monitor and a retrieval tripod to be used during the training. It was reported that a permit-required confined space program was never developed because DPW policy “prohibited workers” from entering a manhole. However, the no-entry policy was not enforced. Numerous incidents of workers entering manholes were confirmed by employee interviews.

This incident could have been much worse. Training is the key, whether it’s just an awareness of the dangers in confined spaces or proper entry and rescue procedures. In this case, the victims had no C/S training even though they may have to respond to an incident, and the worker had not had on-going training through out his career. Periodic training to keep our people safe and aware of proper protocols is key to maintaining a safe work force.

Unfortunately, training is usually one of the first things to be cut when the budget gets tight; however, after an incident, it usually becomes the primary focus. Often the lack of training is determined to be a key element in the tragedy.
Investing in periodic training for the safety of your workforce includes spending the time and money to keep your trainers and training programs up to speed and in compliance. The old saying, “closing the barn doors after the horses escaped,” is no way to protect your people – a little investment in prevention goes along way in preventing these tragedies.

One last comment on my biggest pet peeve – proper, continuous air monitoring. This one step can reduce the potential of a confined space incident by about 50%! Don’t take unnecessary chances that can be deadly.


Rescue Toolbox: Portable Anchors

Thursday, August 9, 2018

PJs use a tripod to extract a patient from a confined space.Portable Anchors – Bipods, Tripods, Gin Poles, and Quads

As rope rescue technicians, we learn early to look for that perfect high-point anchor. You know the one. It’s easy to sling, positioned perfectly in line with the portal and the rescue system, and rated for the anticipated load. We all know that they can be elusive, to say the least.

In locating high-point anchors, we learn to first look straight up for an anchor strong enough and high enough to allow us to clear a vertical litter out of a space (requires about 9 feet). Then we look left and right. Are there beams or substantial anchors high enough and positioned to allow a high-point bridle for our lift? Or maybe there’s an anchor positioned were we may be able to “cowboy” a rope up and over a beam and adjust our end-of-line knot at the appropriate height; and then tie it back to another anchor (extended anchor technique).

But what about those times where we need a high-point anchor, and there is nothing, nada, zilch? No beams, trees, nothing! That’s when we bring our own high-point, also called a portable anchor. 

Portable anchors come in a variety of configurations, the most common being tripods. Even tripods are not all created the same. Some are rated only for equipment, others have different allowable working loads, and they come in a variety of heights.

There is also the option for bipods, quadpods, monopods (gin poles) and some devices that can transform into all of these configurations. They can be centered over a portal for straight, vertical lifts (tripods/quadpods), straddle the plumb line (bipods), or provide a single high-point in an area with a small foot print (monopods). They can even be designed to cantilever out over an edge to provide a clear path for the ropes and ultimately the rescue package. Determining which one to use would be based on your team’s needs and your type of response area.

So, let’s talk about some of the portable anchors that we like to use, including their capabilities and limitations.

Tripods

Rescue Toolbox: Portable Anchors

The SKED-EVAC® Tripod is a simple tubular aluminum tripod with cast header and feet. It extends to a maximum height of 10 feet at the anchor connection points, which gives a good bit of clearance for vertical litters to clear the bottom edge. At full extension (10 feet), the tripod is proof loaded to 5,280 pounds. The SKED tripod is simple to set up, includes a chain to run through the feet to keep the load stresses off the cast header, includes three anchor points, and adjusts in height for situations where there isn’t enough headroom for full extension.

Eccentric Loading and Resultant Forces

Tripods as well as other portable anchors must be respected when it comes to the “direction of pull” on the rescue system and the relationship to the position of the load. Here are a few terms to be familiar with:

Axial loading: The object is loaded in line with the normal fixed axis point (the center of a tripod, equal force on all legs).
Eccentric loading: The load is no longer axial and is offset from the axis point. (The system puts side-load forces on the anchor, or the load is moved out from under the axis point.)
Resultant: This is the relationship between forces acting on an object. (It is the relationship between the load and the vectoring forces of the rescue system from the portable high-point; it is the bisection of this angle.)

The “rule of thumb” for tripods is the resultant forces must remain inside the footprint of the tripod. That is, if the rescue load is pulling straight down (plumb/axial), and the rescue system vectoring forces are angled outside of the footprint of the tripod, then where does the bisection of that angle fall?

Imagine drawing a circle that connects the legs of the tripod. As long as the load and the rescue system remain inside that circle, the resultant will be acceptable, and the tripod will remain axially loaded and not tip over.

There are some techniques to overcome this limitation such as a directional pulley located within the footprint of the tripod. Another technique, which we call the “Pass Through” method (see illustration at bottom), allows counter acting resultant forces to stabilize the tripod. If your haul line is angled too far outside the footprint of the tripod, or the load is moved outside the tripod footprint, the entire tripod is at risk of toppling over (eccentric loading), which could spell disaster.

So, to keep things simple, we often recommend that all lines are kept within the footprint or to add a low directional within the footprint. This provides a small margin for error when hauling or setting up a directional. Technically, you can set up the directional outside the footprint (or pull the haul line outside the footprint) as long as the resultant force is still inside. 

Just remember to envision all lines as though they were loaded before you load the system. We’ve seen plenty of low directionals that were set up perfectly; however, the anchor strap actually allowed them to fall outside the footprint once loaded. As we like to say, "keep it safe and simple!"(KISS) And to play it safe, keep all lines within the footprint.

Multi-Use Portable Anchors

Portable anchors have progressed way beyond the tried-and-true tripods. We are seeing some pretty versatile systems that can be configured as quadpods, bipods, even monopods. These modern systems provide capabilities that go beyond straight vertical lifts while straddling the hole or entry into the rescue subject’s location.

Rescue Toolbox: Portable Anchors

As with most devices that provide additional or alternate capabilities such as monopods and bipods, they are generally more complex and require additional training to fully understand the forces being applied. The ability to extend an anchor point out over the edge of a containment berm, or a cliff edge in a wilderness rescue, will greatly reduce friction on haul lines and reduce rope abrasion, providing clear movement of the rescue package coming up or going down over the edge. This is something that a tripod just cannot provide. But a better mastery of the effects and relationships of the forces being applied needs to be obtained. Understanding and identifying the resultant force is critical in these situations.

These new generation multi-purpose devices, such as the TerrAdaptor™ or the Arizona Vortex, are designed to be used as tripods, bipods, monopods; or in the case of the TerrAdaptor, as a quadpod. They are third party (UL) certified to NFPA 1983 in symmetric tripod and quad-pod configurations. In addition to the straight vertical capabilities, these devices also provide an “over-the-edge” capability. 

For tight areas such as on catwalks, the A-Frame configuration or bipod can provide that portable high-point where a tripod just can’t fit. For extremely tight quarters or when lightweight gear is needed, they can be rigged as a monopod or gin pole. This requires some advanced knowledge of rigging and tiebacks; but, rigged correctly, it provides high strength and a high-point in places no other system would fit.

Sometimes the configuration of the structure or the height of your portable anchor does not allow enough overhead to clear the foot-end of a vertical litter. In instances like this, you may need a simple mechanical advantage assist that is attached low on the litter, or a modified Pick & Pivot technique where the lifting point on the litter is changed from the head to the feet once the litter reaches an edge to allow recovery.

Rescue Toolbox: Portable Anchors

Smaller, Lighter, Stronger

To meet the demands of the USAF Pararescuemen (PJs), Roco worked with Skedco to develop the Roco Tactical Mini-Tripod. 

Reaching about 5 feet at maximum extension with removable legs, it is small enough to carry in the team’s rucksacks, if needed. Its short height also makes it the strongest rescue tripod on the market. Additionally, the removable legs provide the ability to use it as a bipod or A-frame.

Utilizing some simple techniques, a vertical litter patient can be removed from a space with the Roco Mini-Tripod just as easily as with a full-size.

The lighter weight, compact size, and full functionality allow teams with limited manpower and resources to operate without limited capabilities. (Note: in 2023, the Roco Mini Tripod was updated and replaced by Roco's Lowrider™ Compact Rescue Tripod.)

Conclusion

It is important to know what your needs are regarding portable high-point anchors. Complete your rescue preplans. And, if they reveal the need to cantilever out over an edge, or that a bi- or monopod may be required, you may want to consider a multi-functional, portable high-point system that provides capabilities beyond a tripod. Whichever device you choose, always make sure you get the proper training. The unexpected loss of a high-point during training or a rescue could be disastrous. So, be safe, know your equipment and know how to use it.

Check out our selection of tripods in our Gear Shop; or, if you need additional training, review our listing of courses. If you would like to speak with one of our instructors, please call us at 800-647-7626 or email info@RocoRescue.com

Here are several tripod techniques from our new Roco Pocket Guide:

Simple B&T M/A with bottom directional.

Rescue Toolbox: Portable Anchors 

High-point pulley & bottom directional used with piggyback or Z-rig M/A systems.

Rescue Toolbox: Portable Anchors 


Pass-through technique used with piggyback or Z-rig M/A systems.

Rescue Toolbox: Portable Anchors


Firefighter Deaths Lower in 2017

Tuesday, August 7, 2018

Firefighter Deaths Lower in 2017

Deaths among career and volunteer firefighters continued to be low in 2017 with both at the second lowest level since 1977, when the NFPA study began. There were 60 on-duty firefighter fatalities across the nation in 2017. Of these deaths, 21 were career firefighters and 32 were volunteers. The seven remaining deaths were employees or contractors of federal land management agencies. Sudden cardiac death accounted for the largest share of fatalities with 29 deaths. 

There were 17 deaths at fire scenes (9 structure fires and 8 wildland fires). NFPA also reported that an unusually high number of firefighters (10) were struck and killed by vehicles. Two firefighters were killed and another injured by a drunk driver at the scene of downed power lines.

For more detailed information, visit NFPA.org.

Is Your Rescue Team Ready?

Monday, July 23, 2018

Guidance for improving and maintaining rescue team proficiency...

Is Your Rescue Team Ready?
We all want to succeed, no matter what we are doing. And success is always better than the alternatives…whether a mediocre performance or worse yet, failure. When it comes to rescue, all of a sudden, the difference between success and failure takes on much greater significance.Not only are the lives of the rescue subjects held in the balance, but also the rescuers. Multiple risks are involved with technical rescue and failure may cost the rescuers mightily, and this has been proven too many times. There are many things, however, that rescuers can do to help improve their chances of success, and that's what we will talk about here. 
 

We have found that the one thing that seems to be a lagging factor is a "lack of proficiency" in performing the required skills either as individuals or as a team. Having rescue preplans, the newest and best equipment, sufficient manning, and reliable communications are all pieces of the puzzle. But all of that becomes nothing more than window-dressing if the team or individuals on the team are unable to perform their duties safely and effectively. This is such an important consideration that several regulations and standards make a point to remind us that proficiency is a high-interest issue. 

For instance, OSHA 1910.146 paragraph K and Appendix F, as well as 1926.1211, require designated rescuers to practice making permit space rescues at least once every 12 months by means of simulated rescue operations in which they remove dummies, manikins, or actual persons from the actual permit spaces or from representative permit spaces. It is our position that this does not even come close to the training time needed to maintain an appropriate level of proficiency. 

Additionally, NFPA 1006 requires rescuers to demonstrate competency on an annual basis. One of NFPA’s recommendations is to attend workshops and seminars, read professional publications, and participate in refresher training as ways technical rescue personnel can update their knowledge and skills. 

I am routinely asked how often a rescue team should practice. And they're always a bit surprised when I do not give them a hard and fast answer such as quarterly or monthly for a minimum of 4 hours. My answer is and will always be, “as often as it takes to ensure you are proficient, as individuals and as a team, to safely and effectively rescue potential victims from any situation you may be called to respond.”

Is Your Rescue Team Ready?

You would be amazed at the spectrum of training schedules that are out there. Some teams practice on a bi-weekly basis and mix in different scenarios to ensure they will not miss any opportunities to improve their skills or to identify any gaps they may have in technique or equipment. Whereas other teams may feel that once a year is all that they need. Knowing how perishable these skills are, we tend to disagree.

It has been our experience that the teams who practice on a very regular basis and really mix it up when they design their training scenarios are the ones who perform best when they come to our facility or we go to theirs for a team performance evaluation (TPE), which can also include an individual performance evaluation (IPE), if desired. The teams and individuals that struggle most during our TPE/IPE visits are the ones that seldom train. And, even though we all call these TPE/IPE visits, we do provide tips and spot training to help correct any deficiencies observed. 

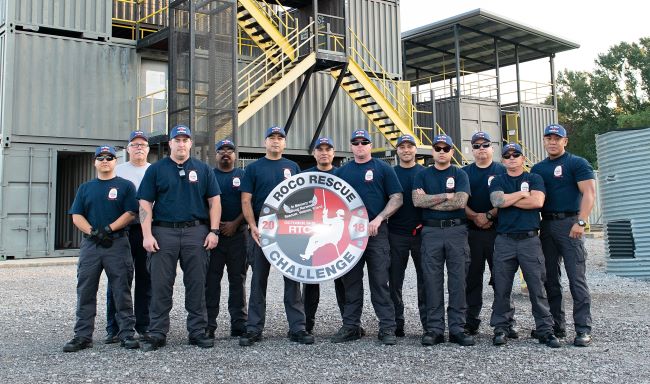
But frequency is no guarantee of excellent performance. It isn’t just about the quantity of training; it must be the quality of training as well. One of the best ways to supplement in-house training is to attend third party refresher training. Or, if it has been a while since a full-on training class, by all means a more extensive and complete training package may be a great option. Roco's annual Rescue Challenge provides an excellent learning experience as well as a way to confirm the true rescue capabilities of your team. 

Technical rescue skills are one of the most perishable skills I have known. Without regular practice and quality training, it is not long before the individual and team skills erode to the point of becoming a liability to the victim and to other team members.

Again, none of us wants to fail - especially on a rescue mission. A good way to avoid this is to dedicate adequate resources to training along with regular refreshers and practice drills. Prepare and practice for your "worst case" scenarios because you just never know when your team may be put to the test. Be ready!

RescueTalk™ (RocoRescue.com) has been created as a free resource for sharing insightful information, news, views and commentary for our students and others who are interested in technical rope rescue. Therefore, we make no representations as to accuracy, completeness, or suitability of any information and are not liable for any errors, omissions, or delays in this information or any losses, injuries, or damages arising from its display or use. All information is provided on an as-is basis. Users and readers are 100% responsible for their own actions in every situation. Information presented on this website in no way replaces proper training!