<img height="1" width="1" src="https://www.facebook.com/tr?id=3990718177617800&amp;ev=PageView &amp;noscript=1">

Q & A with Roco Chief Instructors About 2021 Training Courses

Friday, February 12, 2021

My team has always attended the Roco Industrial I/II, will team members attending the new Urban/Industrial Rescue Essentials™ course have difficulty fitting in with the team?

Troy-Gardner-headshot-w-Roco-hat-editNot at all. The concept of the Urban/Industrial Rescue Essentials course is still focused around producing a well-rounded, proficient rescuer. The primary differences you will notice center around streamlining the techniques utilized by rescuers to be more proficient in “must have” skills, use of updated equipment created through advances in technology, and performing as a member of a team. One of the primary reasons for the course evolving is to provide students with the ability to return as a better TEAM MEMBER and not just a proficient rescuer.

– Chief Instructor Troy Gardner

I previously attended an Industrial I/II course, but it has been several years. What are some of the differences the Urban/Industrial Rescue Essentials course provides?

D024BA00-MAESTRO-L-focus-2_LowRes

There are several noticeable differences you will find in the Urban/Industrial Rescue Essentials course. The biggest difference you will notice is with the equipment utilized during training. The technological advances in rescue equipment over the last several years are impressive to say the least and offer a safe and more efficient approach to rescue.

For example, the Petzl I’D has been the staple of rescue operations for two decades now. It is hard to find a rescue team that does not utilize the I’D as their primary device, or at least knows of its capabilities. Petzl introduced the Maestro in 2020 which dramatically increased the efficiency of our rescue systems with an intuitive design and ease of functionality that makes it well-received by the beginner and the experienced rescuer alike. Also, devices like the ASAP Lock fit the need of being an engineered safety device while increasing the efficiency and reliability of the operator.

72415X_Patient_Tie-In_System_03-1024x683

We also recognized, through input from our instructors, that rescuers would benefit by replacing skills that required continuous practice, such as diamond lashing for patient packaging, with manufactured systems like CMC’s Patient Tie-in System. This allows new rescuers the ability to gain confidence and proficiency by using a simple system vs. trying to absorb more advanced skills and still perform the tasks.

Chris Carlsen, Roco Rescue

Our instructors also recognized the need for students new to rescue to gain a true understanding of how important proper belaying is for safety. To build proficiency in this skill, students are required to “belay a falling load” where they learn the skills necessary to safely and effectively “catch” the load using various techniques.There are several other exciting changes we have made that will benefit the student and produce a higher level of rescuer.

 – Director of Training Chris Carlsen

I work at a fire department that does not respond to any industrial facilities. Would I benefit from attending the Urban/Industrial Rescue Essentials course?

Brad Warr, Roco RescueChoosing the right rescue class can be a daunting task. At Roco Rescue, our instructor cadre is well represented by the fire service and would like to include a few questions for you to think about when determining which course you should attend.  

  • Does your response area have multiple story structures that could present difficulties assisting occupants during emergencies using standard means of egress?
  • Do road crews, utility workers or telecommunication industries in your area perform activities above and/or below ground?
  • Have you ever packaged a patient onto a backboard in a cluttered back bedroom and struggled to get them out? only to find that moving the now boarded patient will be extremely difficult utilizing traditional means?
  • Have you ever pushed your SCBA personal skills to their limits in really tight spaces?
  • Has your crew struggled to move a heavy load that left you wondering if there was an easier way?

If you have ever had any of these questions come up, or one of the many other related questions that apply to fire departments across the globe, then Roco’s Urban/Industrial Rescue Essentials should be at the top of your list. It addresses both the needs of municipal (urban) rescue as well as that of industrial or manufacturing facilities.

– Chief Instructor Brad Warr

The Industrial I/II course was already a full week with a lot to learn. Will my team members struggle to keep up in the new program?

Eddie Chapa, Roco RescueNot at all. In fact, we believe you will have rescue team members returning to your organization with a higher level of retention than ever before. There are some incredible new advancements in equipment and techniques out there, which make it even easier for the novice to acquire the skills to become a proficient rescuer.

Urban/Industrial Rescue Essentials™ has been streamlined to provide a stronger emphasis on key areas of instruction. We have also incorporated numerous improvements in teaching methodology as recommended by our most experienced Roco instructors. This allows students to gain more repetitions in needed skills and retain a higher level of information.

Our goal is to make a better, more prepared rescuer. We believe the new Urban/Industrial Rescue Essentials™ from Roco will do just that.

– Chief Instructor Eddie Chapa

Will sending our rescue team members to the Urban and Industrial Essentials course meet OSHA requirements for confined space rescue?

Chris Carlsen, Roco RescueAlthough OSHA does not provide a specific checklist of the skills or exact performance objectives required to be deemed a competent rescuer, 1910.146 Permit Required Confined Spaces does give us some guidance of what a rescuer should be. In 1910.146 (k)(1)(iii)(A) it states that a rescuer shall “Have the ability to reach the victim(s) within a time frame that is appropriate for the permit space hazards(s) identified”. 1910.146(k)(1)(iii)(B) further states that the rescuer shall be “equipped for and proficient in performing the needed rescue services”.

The Roco Essentials™ course is designed for developing a rescuer who is confident and proficient in the skills necessary to perform rescues in both urban and industrial environments. This ensures that students will be able to return to their team and execute the required tasks necessary to expedite rescue efforts safely and effectively.

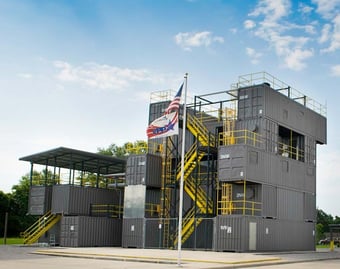
OSHA 1910.146(k)(1)(ii) also requires that the host employer “evaluate” a rescue team’s ability – in terms of proficiency with rescue-related tasks and equipment, and the ability to function appropriately while rescuing entrants from the particular permit space or types of permit spaces identified. Urban/Industrial Rescue Essentials courses conducted at the Roco Training Center provide students with realistic scenarios from all six (6) confined space types, including elevated vessels and towers. The course also includes simulated rescue from IDLH atmospheres requiring the use of SCBA. These scenarios can be used to document a team’s practice requirements listed under 1910.146.

– Director of Training Chris Carlsen

I would really like to send our team members to a Roco certification class, but we do not have the time or funding to dedicate to a Fast-Track course. Is the Urban/Industrial Rescue Essentials course a good compromise?

Kenny Greene, Roco RescueI would not consider the Roco Essentials™ course a compromise by any means. It is a building block of rescue knowledge that your team can use to create highly proficient rescuers. The course is designed to give the rescuer confidence in many of the skills needed to obtain certification to NFPA 1006 by utilizing a very heavy “hands-on” approach to training. Rescuers who attend the Urban/Industrial Rescue Essentials course not only obtain a high level of proficiency in these skills, but they also gain a great understanding of what it takes to make a Rescue Team effective. Rescuers completing this course can also achieve Rescue Technician certification by attending our Confined Space Rescue Technician course.

– Chief Instructor Kenny Greene


Roco Tips for Maintaining Rescue Skills in the Midst of Coronavirus

Monday, February 1, 2021

We are all being confronted with a pandemic that is compelling us to make significant changes in how we go about our day, both on and off the job.  Although we are still hosting training at RTC almost every week, we are hearing from many teams that employers are still placing restrictions on travel and offsite training. We are challenged to adjust our behaviors while still being prepared to perform our rescue duties if called upon, and it is still vitally important to keep your skills sharp. Maintaining rescue skills proficiency was already challenging enough before Coronavirus. As always, it’s important to be ready. 

We would like to offer some tips to help you maintain both your individual and team proficiency.  These tips are not intended to provide the same level of proficiency that attending a formal refresher class would, but we feel they will go a long way in helping you keep your skills at an acceptable, if not a highly polished level.


A rescuer acts as a litter attendant, or "barrelman", during an exercise at the Roco Training Center.

Our Roco training department has put together a list of skills to concentrate on while doing your own in-house independent training.  We based these on the skills that have demonstrated the highest degree of erosion or loss of proficiency over time, and also the skills that are most likely to be called upon for your rescue duties. 

First on the list are knots.  We should all be able to tie the knots we will need for any given rescue system, but let’s take it a step further and strive to become knot craftsmen.  So break out your rope and webbing shorts, and go through your knots.  The beauty of this practice is you can certainly maintain social distancing as you practice either alone or in small groups. 

Let’s go beyond the basics of dress, load and safety, and start to tie knots that make the system more efficient and safer.  For anchor knots like the figure 8 on-a-bight, start gauging how much rope you need to tie the knot with the resulting closed loop being more compact.  My gauge is to end up with a loop that I can easily clip three carabiners into, but not much bigger than that.  Those big loops end up being a hindrance when we are trying to clear a litter out of a vertical portal, or getting a rescue package up and over a parapet or guardrail.  By keeping those finished closed loops nice and compact, you economize and maintain that headroom. 

Work any twists or crossed material out of the knot before loading.  This isn’t just a question of appearance, but in many cases helps maintain the strength of the rope or webbing as you tie the knot.  The biggest advantage of reducing or eliminating twists or crossed material is that it is much easier to untie the knot and is certainly easier to recognize the knot as being correct during final safety checks. 

Practice tying knots around anchors coming from different angles and positions relative to the anchor.  It is easy to tie a clove hitch around a horizontal pipe.  Now start practicing tying it around a vertical anchor.  Or better yet, while you are standing on the opposite side of the anchor from where the standing section of rope is coming from.  It is the same knot, only now you are seeing it from a different orientation. 

So, challenge yourself to become a knot craftsperson.  Tie knots in the dark or blindfolded, behind your back, with winter gloves on, or any other way that is more challenging than in an air-conditioned well-lit room. 

To identify the skills that you should be practicing beyond basic knots, refer to your rescue preplans and list the skills required for your most likely rescues, as well as your worst case scenarios.  Don’t worry about building scenarios yet, instead divide the individual and team skills into discernable categories using the equipment that you have in your rescue cache.  During your rescue plan reviews, make sure to keep an eye out for any plans that need to be updated. 

The most common skills used, and the ones that seem to have a high degree of perishability, are:

  • anchor and system rigging
  • patient packaging
  • mechanical advantages, and
  • converting mechanical advantages to lowers (or vice versa)
A rescuer selects equipment while practicing proper rigging.

ANCHOR AND SYSTEM RIGGING

Anchor rigging is half science and half art.  Of course, we need to identify the anchors that we can use as either single point or multi-point anchors.  Single point anchors are generally easier, but even they can be done with an eye for efficiency vs. just slapping a sling around it and calling it good.  Can we extend that single point anchor to be in a better position to see the load or to be able to communicate more efficiently? Should we extend the anchor out from the wall a bit to allow room to operate a friction control device, versus being jammed against the wall and having to be a contortionist to operate the device?

For multi-point anchors, can we consistently end up with a two-point bridle that approximately shares the load equally between legs?  Are we maintaining safe angles and not approaching that 120 degree critical angle?  Are we hogging the anchors and leaving the safety line system with few or no options for their anchor? 

CONVERTING MAs TO LOWERS

If we anticipate converting a lowering system to a haul system or vice versa, can we make the conversion efficiently?  This is where the use of modern friction control devices makes our job so much easier and safer.  If you are using a device like the Petzl I’D or Maestro, the CMC MPD or Clutch, or any device that can be used for friction control and as a change of direction and progress capture in a haul system, it is good to practice the conversion back and forth from haul to lower and lower to haul, even with a load suspended. 

MECHANICAL ADVANTAGES

Practice building vertical simple MAs, horizontal Z-rigs, and also compound MAs.  Make sure there is always a progress capture or ratchet built into the system.  On the final checks, the system must be the proper ratio, including a final change of direction if called for, have a functioning ratchet, and all carabiners must be locked.  If you want a little tip that works no matter what you are doing, it is this credo:

"Slow is smooth, and smooth is fast."

PATIENT PACKAGING

If you have a rescue manikin in your facility, now is a great time to practice social distancing by practicing patient packaging.  No matter which type of litter you are using, there is a lot of value in practicing with that litter to correctly secure the patient in the litter and then to create a safe and efficient bridle to attach the rescue system.  Practice this for both rigid and flexible litters and for horizontal and vertical orientations. 

For all the skills we have already listed, you can perform the practice solo and then step back to let one of your teammates do a quality and safety check on your work.

Finally, we all like to have some fun when we practice, so why not inject a bit of competition into the scene?  We love to have races to see who can build mechanical advantages fastest, but the most important thing is not the time. When scoring your contest, focus on the accuracy and safety of the finished product.  You can set up multiple lanes separated by the social distancing guidelines and have one team member be the timer and score keeper. 

So remember that team performance is dependent on individual skills coming together to build and operate the right system for the situation at hand.  Now is a great time to focus on individual skills so when this pandemic is finally past us, we can rock it as a rescue team.

(article updated and republished from April 2020)

Is the Petzl Maestro Good for Industrial Rescue?

Monday, November 16, 2020

By Brad Warr, Roco Rescue Chief Instructor

Question: “I noticed that some mountain rescue teams are making the switch to the Petzl Maestro descent device – is this something an industrial rescue team should consider?”

Thanks for the great question. It’s been almost a year since the Petzl Maestro has been on the market, and we have noticed a big uptick in back country teams adopting the Maestro as their primary anchored descend control device. In fact, many of our instructors’ own home-based rescue teams have already made the switch to the Maestro and many of these teams respond to mountain rescue calls.

Petzl_Maestro_RocoTrainingCenter_1To decide whether the Maestro would be a good choice for an urban/industrial rescue team, let’s look at why a mountain rescue team would choose the Maestro. Mountain and back country rescue teams covet light weight, easily transportable equipment. Smaller diameter ropes, lightweight carabiners, pulleys and rope grabs are the norm when you must pack in your own gear. Anyone that has hefted a Petzl Maestro would never consider the device to be petite. At nearly two and a half pounds, the device is far from the featherlight kit usually found in back country response packs. Yet despite the rotund nature of the device, it continues to find its way into the equipment caches that ride on the shoulders of mountain rescue teams. That says a lot about how these teams feel about the Maestro’s performance.

The “intuitive nature” of the Maestro is one of the descender’s strong suits. This is also one of the reasons we chose it for use in our new entry level Roco Urban/Industrial Rescue Essentials™ course. Often attended by brand new rescuers taking their first steps into technical rescue, the Maestro was the perfect fit. At the completion of the first 50-hour course, all Roco instructors commented on how much easier it was to train new rescuers to use the Petzl Maestro compared to other popular descent control devices. It allowed our students to progress quickly while increasing their safety as well.

Petzl_Maestro_RocoTrainingCenter_2Mountain rescue teams are also very aware of the corollary between “friction management” and system efficiency. When you are working in small teams with potential for lots of friction running over rock and dirt, a device that can greatly increase friction reduction during hauls is very appealing. The Maestro delivers friction reduction in spades. The faceted sheave in the Maestro delivers up to 95% pulley efficiency.

The Maestro’s ease of use, consistent control and efficient operation were a few of the reasons we chose it for our courses. While Roco’s advanced classes delve into other personal and anchored descenders, we feel the Maestro gives the highest likelihood of success for new and experienced rescuers. The Petzl name behind the device gives us confidence in its dependability.

As an Urban/Industrial rescuer, we can take the experiences of top mountain rescue teams in the country to heart. If they are willing to carry the extra weight of the Maestro based on its performance, then perhaps we should carefully consider the Maestro as our primary choice for descent control.

To learn more about the Petzl Maestro, read our full review or join us for one of our newly designed rescue courses for 2021. Roco’s new Urban/Industrial Rescue Essentials™ 50-hour entry level course strives to create rescue team members that can contribute from Day 1.

Check out our current open-enrollment course schedule for upcoming training dates, or review our complete course descriptions to find the right course for your needs.


Brad Warr

Brad Warr is a Chief Instructor for Roco Rescue and a Captain at the Nampa Fire Department. Brad joined Roco Rescue in 2003, teaching a wide variety of technical rescue classes including rope rescue, confined space rescue, trench rescue, and structural collapse. Brad became a firefighter for the Nampa Fire Department in 1998 and was promoted to Captain in 2006. Before joining the fire department, Brad worked for three years as an Emergency Response Technician for a large computer chip manufacturer in Boise, Idaho, where he was responsible for OSHA compliance, emergency medical response, confined space/rope rescue response and hazardous materials response.

Pat Furr Retires: A Farewell Thank You to our Rescue Community

Monday, August 17, 2020

Well folks, after over forty years of working full time in the technical rescue field – twenty plus years as an Air Force PJ, and almost another twenty with Roco Rescue – I am hanging up my rescue harness for good.  It is not that it is worn out, and in fact it is in pretty good shape, as it hasn’t seen much action in the last few years. It is more that I want to get out and play full time before I am totally worn out.  So I am retiring. 

I want to take this opportunity to say “Thank You” to all of the folks that I have had the honor to work alongside, learn from, teach, and collaborate with on various projects.  I can say without any hesitation, and with deep humility, that I am a different and much better person than I was forty one years ago.  

Pat-Furr-1024x768That is largely due to the folks that I have been surrounded with in that time.  They nudged me, and at times that nudge was pretty solid, in the right direction. Because of the nature of rescuers in general, some of your best human qualities were bound to rub off on me.  And for that, I thank you. 

I don’t want to single out any individuals for particular thanks, because this article would go on forever if I started down that road.  But I do want to say thank you to my supervisors, managers, and company leaders that I have been blessed to have guide, mentor, and support me.  This holds true for my time in the Air Force as well as with Roco.  My Non-Commissioned Officers in Charge (NCOICs) during my time as a PJ were the best I could have hoped for.  And the same holds true for the President, VP, and other managers at Roco.  They each had, and have their own unique, and to me, highly desirable styles of leadership.  They all impressed upon me the value of setting clear and meaningful expectations, leading from the front by putting in the work and effort to demonstrate their own self accountability, but most importantly, they have all been very fair.  

To my teammates as a PJ, as a Roco CSRT Member, and Instructor:  I have been surrounded by a herd of type A go getters for forty years, and to say that was never a challenge, would be a flat out lie.  But I have enjoyed that challenge as it kept me on my toes and honest.  There was never any room for BS or taking shortcuts, because I knew I would be called out on it.  That really helps one develop good habits and to avoid the bad ones.   I have learned so much from my teammates that it astounds me to just stop and think of all the ideas and efforts to make things better that we have worked on together. 

I also want to thank the support staff that have put in so much time, effort, and dedication that goes on behind the scenes.  Without the support of our training coordinators, equipment managers, payroll, schedulers, facility managers, operations mangers, sales, general admin, human resources, and so many others, we couldn’t possibly do what we do. 

Finally, I want to thank our customers, both our students and our CSRT clients.  At Roco Rescue we try to provide the best courses of instruction, as well as the most professional CSRT services we can.  This includes listening to what our customers have to say, both good and sometimes not so much.  I can’t tell you how much our services have improved over the years based on feedback from our customers.  We have had so many characters as customers that my catalog of funny stories is volumes deep.   For that alone, this has been a very rewarding career. 

So as I rappel off into the sunset, I bid you farewell, be safe, and remember that the path you have chosen is a noble and very rewarding one.  Walk down that path with pride, dedication, and with the knowledge that your efforts in being the best rescuer you can be, will ultimately give those that need you in an emergency, that chance to live out their own dreams.   

Until we meet again, you can find me sailing on Lake Champlain, mountain biking some gnar in New England, exploring with my lovely wife and our dog, gathering mushrooms or seeking the perfect sunset and doing some community volunteerism. 

In other words, I ain’t dead yet. 

Pat Furr

Trench Safety Stand Down Resources

Wednesday, June 17, 2020

June is Trench Safety Month and June 15-19 is Trench Safety Stand Down week. We are partnering with NUCA (National Utility Contractors Association) to encourage everyone who does trenching or excavation as part of their work to participate in the Stand Down by holding a toolbox talk on trench safety. Here's how you can prepare for your stand down. (Remember, participating in the stand down by talking about safety is more important than when you do it.) 

We're also making available a number of informational resources you can use as part of a safety talk or presentation (see below). Our webinar with NUCA about the trench competent person, as well as how you can help the rescue team should you need to call them had lots of great questions. We didn't have time to address all of them within the hour.

Below are the questions that we didn't get to discuss live, and the answers.

What is the maximum gap allowed between the dirt and backside of a trench box or sheet piling?

OSHA speaks to this issue in the standard and a Letter of Interpretation. From OSHA Standard 1926.652(g)(ii) requires that trench shields be installed “to restrict lateral or other hazardous movement.”

 This Letter of Interpretation states " although our standard does not set a maximum distance between a shield box and a trench face, an employer would be required to ensure that, in the event of a collapse of the face, the shield would not move laterally. "

If you are sitting in an excavator inside the excavation, does it still need to be sloped in accordance with the standard?

Yes, OSHA requires that all employees that are exposed to soil collapse shall be protected from potential cave-in. In a Letter of Interpretation, OSHA does speak directly to pile-driving equipment and operations and states that the excavation must be sloped/protected.

We recently had a vendor come out selling inflatable trench panels.  Anybody have experience with them, or an opinion on them?

We circulated this question among our trench rescue instructors, who are also active rescuers in municipal departments from New York to Idaho. We have not had first-hand experience with inflatable trench panels, either by demonstration or in actual use. Thank you for making us aware of this alternative equipment.

Is a Daily Excavation Safety Checklist required to be completed prior to work starting for the day?

The OSHA standard requires a daily inspection be completed prior to the start of work, after any rainstorm, dewatering activities, and after any hazard causing event.

If a trench box is installed, is it best to back fill around the box to prevent sudden failures of soil outside of the box from crashing into the box?  In other words, fill the void spaces / eliminate soil momentum?

OSHA speaks to this issue in the standard and a Letter of Interpretation. From OSHA Standard 652(g)(ii) requires that trench shields be installed “to restrict lateral or other hazardous movement.”

 The Letter of Interpretation states "although our standard does not set a maximum distance between a shield box and a trench face, an employer would be required to ensure that, in the event of a collapse of the face, the shield would not move laterally. "

Should excavations beyond 4 - 5 feet in depth be permit required confined spaces?

No. The OSHA Construction Industry Confined Space Standard Subpart AA 1926.1201(b)(1) states that the standard does not apply to construction work regulated by 1926 Subpart P—Excavations. However, an entity may choose to exceed OSHA’s minimum requirements and classify excavations/trenches as confined spaces. If an entity does apply the definition to a trench, then they are now required to follow all of the confined space requirements as stipulated in 1926.1200 Subpart AA.

More Resources


Toolbox talk English

Here's a great 1-pager designed for a toolbox talk:


Toolbox talk Spanish


And here's the same 1-pager in Spanish:


This is a checklist you can use for planning and continuous monitoring of an open trench, and also a good topic of conversation to share with your team:

Daily Excavation Checklist 


Questions? Reach out to us. We're here to help.

Stay Safe,

The Roco Rescue Team


IMPORTANT: The information at RocoRescue.com is provided as a complimentary service. It is a general information resource and is not intended as legal advice. Because standards and regulations relating to this topic are typically performance based, and compliance with those standards and regulation is often dependent on the specific circumstances and conditions at hand, it is always important to carefully review all relevant standards and regulations, and to follow the proper protocols specific to your company or agency.

RescueTalk™ (RocoRescue.com) has been created as a free resource for sharing insightful information, news, views and commentary for our students and others who are interested in technical rope rescue. Therefore, we make no representations as to accuracy, completeness, or suitability of any information and are not liable for any errors, omissions, or delays in this information or any losses, injuries, or damages arising from its display or use. All information is provided on an as-is basis. Users and readers are 100% responsible for their own actions in every situation. Information presented on this website in no way replaces proper training!