<img height="1" width="1" src="https://www.facebook.com/tr?id=3990718177617800&amp;ev=PageView &amp;noscript=1">

Rescue Toolbox: Portable Anchors

Thursday, August 9, 2018

PJs use a tripod to extract a patient from a confined space.Portable Anchors – Bipods, Tripods, Gin Poles, and Quads

As rope rescue technicians, we learn early to look for that perfect high-point anchor. You know the one. It’s easy to sling, positioned perfectly in line with the portal and the rescue system, and rated for the anticipated load. We all know that they can be elusive, to say the least.

In locating high-point anchors, we learn to first look straight up for an anchor strong enough and high enough to allow us to clear a vertical litter out of a space (requires about 9 feet). Then we look left and right. Are there beams or substantial anchors high enough and positioned to allow a high-point bridle for our lift? Or maybe there’s an anchor positioned were we may be able to “cowboy” a rope up and over a beam and adjust our end-of-line knot at the appropriate height; and then tie it back to another anchor (extended anchor technique).

But what about those times where we need a high-point anchor, and there is nothing, nada, zilch? No beams, trees, nothing! That’s when we bring our own high-point, also called a portable anchor. 

Portable anchors come in a variety of configurations, the most common being tripods. Even tripods are not all created the same. Some are rated only for equipment, others have different allowable working loads, and they come in a variety of heights.

There is also the option for bipods, quadpods, monopods (gin poles) and some devices that can transform into all of these configurations. They can be centered over a portal for straight, vertical lifts (tripods/quadpods), straddle the plumb line (bipods), or provide a single high-point in an area with a small foot print (monopods). They can even be designed to cantilever out over an edge to provide a clear path for the ropes and ultimately the rescue package. Determining which one to use would be based on your team’s needs and your type of response area.

So, let’s talk about some of the portable anchors that we like to use, including their capabilities and limitations.

Tripods

Rescue Toolbox: Portable Anchors

The SKED-EVAC® Tripod is a simple tubular aluminum tripod with cast header and feet. It extends to a maximum height of 10 feet at the anchor connection points, which gives a good bit of clearance for vertical litters to clear the bottom edge. At full extension (10 feet), the tripod is proof loaded to 5,280 pounds. The SKED tripod is simple to set up, includes a chain to run through the feet to keep the load stresses off the cast header, includes three anchor points, and adjusts in height for situations where there isn’t enough headroom for full extension.

Eccentric Loading and Resultant Forces

Tripods as well as other portable anchors must be respected when it comes to the “direction of pull” on the rescue system and the relationship to the position of the load. Here are a few terms to be familiar with:

Axial loading: The object is loaded in line with the normal fixed axis point (the center of a tripod, equal force on all legs).
Eccentric loading: The load is no longer axial and is offset from the axis point. (The system puts side-load forces on the anchor, or the load is moved out from under the axis point.)
Resultant: This is the relationship between forces acting on an object. (It is the relationship between the load and the vectoring forces of the rescue system from the portable high-point; it is the bisection of this angle.)

The “rule of thumb” for tripods is the resultant forces must remain inside the footprint of the tripod. That is, if the rescue load is pulling straight down (plumb/axial), and the rescue system vectoring forces are angled outside of the footprint of the tripod, then where does the bisection of that angle fall?

Imagine drawing a circle that connects the legs of the tripod. As long as the load and the rescue system remain inside that circle, the resultant will be acceptable, and the tripod will remain axially loaded and not tip over.

There are some techniques to overcome this limitation such as a directional pulley located within the footprint of the tripod. Another technique, which we call the “Pass Through” method (see illustration at bottom), allows counter acting resultant forces to stabilize the tripod. If your haul line is angled too far outside the footprint of the tripod, or the load is moved outside the tripod footprint, the entire tripod is at risk of toppling over (eccentric loading), which could spell disaster.

So, to keep things simple, we often recommend that all lines are kept within the footprint or to add a low directional within the footprint. This provides a small margin for error when hauling or setting up a directional. Technically, you can set up the directional outside the footprint (or pull the haul line outside the footprint) as long as the resultant force is still inside. 

Just remember to envision all lines as though they were loaded before you load the system. We’ve seen plenty of low directionals that were set up perfectly; however, the anchor strap actually allowed them to fall outside the footprint once loaded. As we like to say, "keep it safe and simple!"(KISS) And to play it safe, keep all lines within the footprint.

Multi-Use Portable Anchors

Portable anchors have progressed way beyond the tried-and-true tripods. We are seeing some pretty versatile systems that can be configured as quadpods, bipods, even monopods. These modern systems provide capabilities that go beyond straight vertical lifts while straddling the hole or entry into the rescue subject’s location.

Rescue Toolbox: Portable Anchors

As with most devices that provide additional or alternate capabilities such as monopods and bipods, they are generally more complex and require additional training to fully understand the forces being applied. The ability to extend an anchor point out over the edge of a containment berm, or a cliff edge in a wilderness rescue, will greatly reduce friction on haul lines and reduce rope abrasion, providing clear movement of the rescue package coming up or going down over the edge. This is something that a tripod just cannot provide. But a better mastery of the effects and relationships of the forces being applied needs to be obtained. Understanding and identifying the resultant force is critical in these situations.

These new generation multi-purpose devices, such as the TerrAdaptor™ or the Arizona Vortex, are designed to be used as tripods, bipods, monopods; or in the case of the TerrAdaptor, as a quadpod. They are third party (UL) certified to NFPA 1983 in symmetric tripod and quad-pod configurations. In addition to the straight vertical capabilities, these devices also provide an “over-the-edge” capability. 

For tight areas such as on catwalks, the A-Frame configuration or bipod can provide that portable high-point where a tripod just can’t fit. For extremely tight quarters or when lightweight gear is needed, they can be rigged as a monopod or gin pole. This requires some advanced knowledge of rigging and tiebacks; but, rigged correctly, it provides high strength and a high-point in places no other system would fit.

Sometimes the configuration of the structure or the height of your portable anchor does not allow enough overhead to clear the foot-end of a vertical litter. In instances like this, you may need a simple mechanical advantage assist that is attached low on the litter, or a modified Pick & Pivot technique where the lifting point on the litter is changed from the head to the feet once the litter reaches an edge to allow recovery.

Rescue Toolbox: Portable Anchors

Smaller, Lighter, Stronger

To meet the demands of the USAF Pararescuemen (PJs), Roco worked with Skedco to develop the Roco Tactical Mini-Tripod. 

Reaching about 5 feet at maximum extension with removable legs, it is small enough to carry in the team’s rucksacks, if needed. Its short height also makes it the strongest rescue tripod on the market. Additionally, the removable legs provide the ability to use it as a bipod or A-frame.

Utilizing some simple techniques, a vertical litter patient can be removed from a space with the Roco Mini-Tripod just as easily as with a full-size.

The lighter weight, compact size, and full functionality allow teams with limited manpower and resources to operate without limited capabilities. (Note: in 2023, the Roco Mini Tripod was updated and replaced by Roco's Lowrider™ Compact Rescue Tripod.)

Conclusion

It is important to know what your needs are regarding portable high-point anchors. Complete your rescue preplans. And, if they reveal the need to cantilever out over an edge, or that a bi- or monopod may be required, you may want to consider a multi-functional, portable high-point system that provides capabilities beyond a tripod. Whichever device you choose, always make sure you get the proper training. The unexpected loss of a high-point during training or a rescue could be disastrous. So, be safe, know your equipment and know how to use it.

Check out our selection of tripods in our Gear Shop; or, if you need additional training, review our listing of courses. If you would like to speak with one of our instructors, please call us at 800-647-7626 or email info@RocoRescue.com

Here are several tripod techniques from our new Roco Pocket Guide:

Simple B&T M/A with bottom directional.

Rescue Toolbox: Portable Anchors 

High-point pulley & bottom directional used with piggyback or Z-rig M/A systems.

Rescue Toolbox: Portable Anchors 


Pass-through technique used with piggyback or Z-rig M/A systems.

Rescue Toolbox: Portable Anchors


Is Your Rescue Team Ready?

Monday, July 23, 2018

Guidance for improving and maintaining rescue team proficiency...

Is Your Rescue Team Ready?
We all want to succeed, no matter what we are doing. And success is always better than the alternatives…whether a mediocre performance or worse yet, failure. When it comes to rescue, all of a sudden, the difference between success and failure takes on much greater significance.Not only are the lives of the rescue subjects held in the balance, but also the rescuers. Multiple risks are involved with technical rescue and failure may cost the rescuers mightily, and this has been proven too many times. There are many things, however, that rescuers can do to help improve their chances of success, and that's what we will talk about here. 
 

We have found that the one thing that seems to be a lagging factor is a "lack of proficiency" in performing the required skills either as individuals or as a team. Having rescue preplans, the newest and best equipment, sufficient manning, and reliable communications are all pieces of the puzzle. But all of that becomes nothing more than window-dressing if the team or individuals on the team are unable to perform their duties safely and effectively. This is such an important consideration that several regulations and standards make a point to remind us that proficiency is a high-interest issue. 

For instance, OSHA 1910.146 paragraph K and Appendix F, as well as 1926.1211, require designated rescuers to practice making permit space rescues at least once every 12 months by means of simulated rescue operations in which they remove dummies, manikins, or actual persons from the actual permit spaces or from representative permit spaces. It is our position that this does not even come close to the training time needed to maintain an appropriate level of proficiency. 

Additionally, NFPA 1006 requires rescuers to demonstrate competency on an annual basis. One of NFPA’s recommendations is to attend workshops and seminars, read professional publications, and participate in refresher training as ways technical rescue personnel can update their knowledge and skills. 

I am routinely asked how often a rescue team should practice. And they're always a bit surprised when I do not give them a hard and fast answer such as quarterly or monthly for a minimum of 4 hours. My answer is and will always be, “as often as it takes to ensure you are proficient, as individuals and as a team, to safely and effectively rescue potential victims from any situation you may be called to respond.”

Is Your Rescue Team Ready?

You would be amazed at the spectrum of training schedules that are out there. Some teams practice on a bi-weekly basis and mix in different scenarios to ensure they will not miss any opportunities to improve their skills or to identify any gaps they may have in technique or equipment. Whereas other teams may feel that once a year is all that they need. Knowing how perishable these skills are, we tend to disagree.

It has been our experience that the teams who practice on a very regular basis and really mix it up when they design their training scenarios are the ones who perform best when they come to our facility or we go to theirs for a team performance evaluation (TPE), which can also include an individual performance evaluation (IPE), if desired. The teams and individuals that struggle most during our TPE/IPE visits are the ones that seldom train. And, even though we all call these TPE/IPE visits, we do provide tips and spot training to help correct any deficiencies observed. 

But frequency is no guarantee of excellent performance. It isn’t just about the quantity of training; it must be the quality of training as well. One of the best ways to supplement in-house training is to attend third party refresher training. Or, if it has been a while since a full-on training class, by all means a more extensive and complete training package may be a great option. Roco's annual Rescue Challenge provides an excellent learning experience as well as a way to confirm the true rescue capabilities of your team. 

Technical rescue skills are one of the most perishable skills I have known. Without regular practice and quality training, it is not long before the individual and team skills erode to the point of becoming a liability to the victim and to other team members.

Again, none of us wants to fail - especially on a rescue mission. A good way to avoid this is to dedicate adequate resources to training along with regular refreshers and practice drills. Prepare and practice for your "worst case" scenarios because you just never know when your team may be put to the test. Be ready!

Job Assignments and Rescue Duties

Wednesday, May 2, 2018

Job Assignments and Rescue DutiesQUESTION: Should industrial rescue team members be informed of any scheduled confined space entries at the beginning of their shift?

ANSWER: While OSHA does not mandate that individual team members be notified; common sense and best practices do. Here’s our reasoning for encouraging this “information sharing” at the beginning of each shift.

First of all, it is the Entry Supervisor’s responsibility to ensure that the rescue service is available prior to each PRCS entry. This verification should be performed in a way that confirmation of availability can be documented. There are various reasons that the in-house team may not be immediately available, so it’s up to the Entry Supervisor to plan ahead and coordinate with the team. Most often in-house industrial rescue team members have regular job assignments in addition to their rescue duties. Depending on the particular assignment, he or she may or may not be available to respond to a rescue emergency. In fact, we have heard of incidents where the Entry Supervisor just “assumed” that because the facility had an in-house rescue team that the team would always be ready to respond. In one instance when an in-house team was notified of a PRCS emergency, only one (1) team member was on shift and available to respond. Apparently, other team members were on sick leave, vacation, or at shift change. As you can see, two-way communication between the Entry Supervisor and the rescue service is a must!

Having a system in place that allows on-duty team members to be aware of PRCS entries that are scheduled during a given shift allows them to start the preplan process, which will help reduce response and preparation times. It also provides Team Leaders (IC) with a better understanding of possible rescue needs and how best to utilize available resources if an emergency situation should arise. And, these are just some of the reasons we recommend that on-duty team members be accounted for and be made aware of any entries occurring during their shift - including the location, the type of entry and the hazards involved. It simply provides for better preparation; thus, making everyone safer.

Why is LOTO So Important?

Tuesday, April 3, 2018

Foundry Fined for Confined Space Amputation Accident

Why is LOTO So Important?Los Angeles - Cal/OSHA has cited a local foundry $283,390 for workplace safety and health violations following a confined space accident that resulted in the amputation of an employee’s legs. Cal/OSHA had cited the foundry for similar violations eight years ago.

Two workers were cleaning and unjamming a 38-foot long auger screw conveyor at the bottom hopper of an industrial air filtration device without effectively de-energizing or locking out the equipment.

One of the workers re-entered the 20-inch square opening after the cleaning was done to retrieve a work light from inside the confined space, when a maintenance worker 45 feet away energized the equipment to perform a test.

The moving auger screw pulled the worker into the screw conveyor. Both his legs had to be amputated in order to free him.

“Sending a worker into a confined space is dangerous, especially inside machinery that can be powered on at any time,” said Cal/OSHA Chief Juliann Sum.
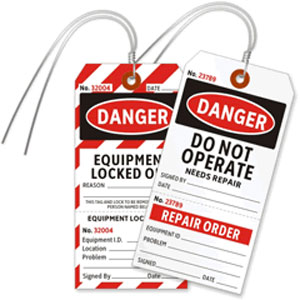
Employers must ensure that machinery and equipment are de-energized and locked out before workers enter the space to perform operations involving cleaning and servicing.

Cal/OSHA’s investigation found that:

• The foundry did not have a permit-required confined space program.
• The screw conveyor was not de-energized and locked out before workers entered the hopper, and accident prevention signs were not placed on the controls.
• The worker re-entering the hopper was not monitored by a confined space attendant.
• The foundry lacked specific procedures for de-energizing and locking out the equipment.

Cal/OSHA issued eight citations with proposed penalties totaling $283,390. The eight violations cited included one willful serious accident-related, one willful serious, four serious, one willful general and one general in nature.

Source: www.dir.ca.gov News Release No.: 2018-15 Date: March 7, 2018

New Pocket Guide from Roco

Monday, February 12, 2018

New Pocket Guide from Roco Newly revised and updated with 82-pages of color drawings and detailed illustrations, Roco's new Pocket Guide features techniques taught in our rescue classes. Made from synthetic paper that is impervious to moisture makes this pocket-sized guide the perfect reference during training or on the scene.

Pocket Guide features: Knots - Rigging - Patient Packaging - Lower/Hauling Systems - Tripod Operations - Low Angle - Pick-off Rescue - High-lines - Confined Spaces and much more.

Reference charts include: Confined Space Types, Suspension Trauma, and Rescue Gear Service Life Chart.

Click here to order your copy today!!

RescueTalk™ (RocoRescue.com) has been created as a free resource for sharing insightful information, news, views and commentary for our students and others who are interested in technical rope rescue. Therefore, we make no representations as to accuracy, completeness, or suitability of any information and are not liable for any errors, omissions, or delays in this information or any losses, injuries, or damages arising from its display or use. All information is provided on an as-is basis. Users and readers are 100% responsible for their own actions in every situation. Information presented on this website in no way replaces proper training!