<img height="1" width="1" src="https://www.facebook.com/tr?id=3990718177617800&amp;ev=PageView &amp;noscript=1">

Roco QUICK DRILL #10 - Tripod Quick Drill

Monday, February 8, 2016

Roco QUICK DRILL #10 - Tripod Quick DrillRescue tripods provide a mobile and rapidly deployable high-point anchor option for confined space emergencies. Like any piece of equipment, however, it has its limitations. It is important that your team becomes proficient with this tool in training to ensure fluid deployment during a live rescue. 

There are two primary topics to review regarding rescue tripod operations: Set-Up and Rigging. Here’s a quick drill to help you and your team become more proficient in its use.

Set-Up

1. Find an area to review your tripod operations. Ideally, train over a potential rescue space, keeping in mind safety around any open spaces. As with any training exercise, always use proper PPE and take proper fall protection precautions. If you don’t have access to potential spaces or are training in a municipal environment, improvise with a closed street manhole or create a mock-up opening with wood or cardboard.

2. Deploy your tripod. While you are deploying it, discuss the following with your team:

a. When do you setup the tripod in a rescue operation? Prior to rescuer entry? During packaging stage? During extrication stage?

b. Do we setup the tripod over the space or in a safe area, then move the tripod over the space?

c. What type of patient packaging will be done and at what height will the tripod need to be in order to clear packaging out of space?

d. Tripod strengths at different height settings. Is height more important or strength?

e. Can the legs of the tripod be different lengths or rest on different elevated surfaces?

f. Should the tripod be tied down so it won’t tip?

g. Keeping resultant forces within the legs of the tripod to prevent tipping.

h. Insure correct assembly, including the use of the tripod’s chain to prevent overspreading the legs of the tripod.

Now that your tripod is assembled, move on to rigging.

Rigging

Rig each of the following systems and raise and lower a load/weight. This shows the pros and cons of operating each system. Show how the resultant forces can be applied by the haul position or by patient movement outside the tripod footprint. In most cases, there are three rigging options for tripod operations. Rig each, while discussing each method’s strengths and weaknesses.

1. Block and Tackle System

a. Often pre-rigged and therefore rapid to deploy.

b. Will the length of the collapsed system create height constraints to remove the victim from the space?

c. Does the height of the tripod create any issues operating the cam of the system?

d. Rope length vs depth of space; what strength M/A will you be able to build?

e. Can the haul team keep resultant haul forces within the legs or footprint of the tripod to prevent tipping, or do we need to have a change of direction pulley?

2. Single Main Line with COD (change of direction) within the Tripod’s Footprint

a. Better option when the tripod’s height and victim clearance are concerns.

b. Enables the lower/haul team to operate remote of the space.

c. Necessitates an anchor point within the tripod’s footprint and an anchor point for the main line.

d. Allows for reaching greater depths than a block and tackle system.

e. Single line entering the space and allows for attachment of patient air bottle.

f.  Takes more time to rig.

3. Pass-Through Method

a. A solution when the block and tackle or single main line techniques will not work (no anchor point within footprint of tripod available).

b. Increased Mechanical Advantage (6x1).

c. Requires two remote in-line anchor points on opposite sides of the space.

d. Two traveling lines in the space.

e. Eliminates concerns with haul-resultant forces.

f. Most complicated of the three systems.

A properly deployed rescue tripod can be a game changer for a confined space rescue. As with any piece of equipment, continuous training with the device and its associated techniques is necessary to maintain “proficiency,” which translates into safety and efficiency! Always, train hard so that your team will perform when the call comes!


Next in this series: QUICK DRILL #11 - Patient Packaging (Single Rescuer)

QuickDrill11


Roco QUICK DRILL #9 - Belay Systems

Monday, November 30, 2015

Roco QUICK DRILL #9 - Belay SystemsDue to their relative simplicity, belay systems rarely see the dedicated training that is often given to the other elements of rescue, such as mechanical advantage or patient packaging. Just because you can rig a 540 Belay Device or tie a Munter Hitch does not necessarily mean you are proficient in their use.
It is important that the belayer can choose the proper belay system for the anticipated load and situation as well as understand the pros and cons of each system. Rescue teams must also be able to properly rig the system, troubleshoot any problems that might arise, catch the load and be able to safely transition from the "catch" to an emergency lowering system, if needed. 

There is a certain degree of finesse and anticipation involved with efficient belaying. It is an important skill only acquired through practice. Allotting more time to belay-specific training will provide payoff in smoother, safer operations during your next rescue.

1. As a team, discuss the belay needs of your environment (type of device or hitch, need for confined space rigging, high-point/low-point usage, one-person/two-person loads, etc.).

2. Divide your team into pairs and have each pair rig a specified device or hitch as a horizontal ground station.

3. While one member operates the device, the other attaches to the working end of the belay line and walks backwards to simulate a moving load. The team member on the line can also simulate a sudden load being applied to the rope at random intervals for the belayer to catch by pulling quickly on the working end of the rope.

4. If using the 540 Belay Device, develop proficiency in releasing a "stuck" load.

5. When using a Munter, work on body/hand position and tying off the Munter with a mule knot and releasing the mule knot while under load.

6. With tandem prusiks, practice converting to a lower system.

7. No matter what device or system, focus on maintaining a steady rate of rope progress through the device, while maintaining the proper amount of slack in the system (maximum 18 inches).

8. Have members switch positions and/or devices as they work on proficiency.

9. If time and training space allow, rig simple lower/haul scenarios where the emphasis will be on belay practice. In these scenarios, focus on the following:
       • Communication between the Rescue Master and the Belayer.
       • Maintaining the appropriate amount of slack in the belay system (no more than 18 inches).

Efficient belay skills are often taken for granted. Be sure to master the use of these critical, lifesaving systems!


Next in this series: QUICK DRILL #10 - Tripod Quick Drill

QuickDrill10


Roco QUICK DRILL #8 - Petzl ID

Thursday, August 27, 2015
Roco QUICK DRILL #8 - Petzl ID

Maintain Proficiency with Ground Station Drills

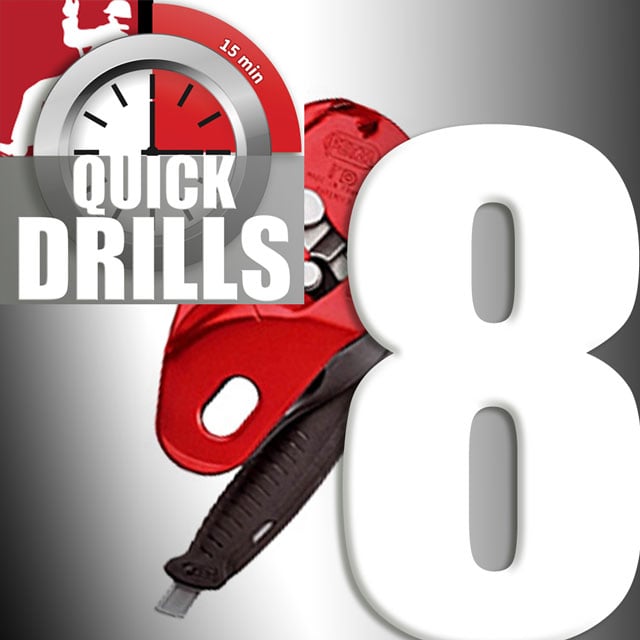
The Petzl ID is a great device. However, as with any device or technique, if you don’t practice, you risk forgetting some of the basic principles and functions involved in its proper use. Using quick and easy-to-set-up ground stations will help to keep proficiency levels up while reducing risk, logistics, and time required.

Here are some drills and ground station ideas that will help the Petzl ID operator stay proficient. Keep in mind, these hands-on ground stations can often be applied to other devices and techniques as well – not every training session requires suspending rescuers!

Station Set-Up

Choose a solid anchor at ground level with about 10 feet of space to move and pull rope. This can be done in a classroom, apparatus bay or other area since the drill is about proficiency in using the ID and its different functions.

Taking-in Slack “TENSION”

Have the participant load and anchor the device as a lower. Pull at least 5-to-10 feet of slack out of the device and have participant pull the slack out of the system through the device as if setting a plumb point.

Have the operator stand in front of the ID, facing the anchor. Hold the two ends of the rope in front of the device and close together. This will prevent the safety cam from grabbing the rope while the participant strips rope on the standing end of the device (the 11 O’clock) to take-in (tension) slack.

Remember, taking in slack (tensioning) is also important when starting a Z-rig haul as the system may not automatically start stripping/cleaning the rope through the device if it should be locked. In this case, the load would not be captured and any progress gained would be lost or dropped if the haul team let go of the haul line. This may also occur initially with a 5:1 Z-rig, even if the device is unlocked, until the full load is on the system.

Giving-out Slack “SLACK”

To give out (or feed) slack, have the operator remain in the descent control position (behind the device). Keeping the device with the top or bottom plates facing the ground, simply use the left hand to turn the body of the ID perpendicular to the direction of the load travel as rope is pulled with the right hand from the 7 O’clock position of the ID. Simulate adjusting a plumb point or feeding slack once a lower is complete and the patient is on the ground.

Rappel Ground Exercise

Have participants anchor the rope for a rappel and attach the ID to the rope and their harnesses. Have them lean away from the anchor and walk backwards while using the device to control speed. Review hand and body positions and have operators pull the ID into panic mode and reset. Direct participants to let go of the rope in order to build confidence in the automatic braking of the device. Also, have them practice tensioning and feeding slack (adjusting rappel plumb point) while in the rappel mode.

This drill may seem too simple to be of any benefit, but how many of us have watched our teammate fumble with loading, or fumble while trying to adjust the tension or give slack on an anchored ID? The more hands-on time operating this device, the better! Practicing a technique at ground level will help rescuers be more proficient when they “live load” a system during training, or when performing a real rescue.

The Petzl ID Video

Review the features of the popular rescue tool with Roco Chief Dennis O'Connell.


Next in this series: QUICK DRILL #9 - Belay Systems

QuickDrill-09


Roco QUICK DRILL #7 - Anchor Selection and Rigging

Wednesday, April 8, 2015

Roco QUICK DRILL #7 - Anchor Selection and Rigging Maintaining proficiency when building rescue systems requires skills and experience – that’s why regular practice is critical!
With continued practice in keeping it safe and simple (KISS), rescuers can learn to be more efficient with their equipment as well as in selecting and setting up rigging anchors. Proficiency with this allows them to get a running start in constructing the foundation of all rescue systems.

1.  Use an area that has a variety of simulated anchor opportunities. Try to create a mix of bombproof, substantial, and inappropriate anchors.

2.  Clearly state the objectives and point out exactly where the lines have to fall in terms of plumb line, and whether it’s to be set up as a lowering system, safety line belay or static line (rappel line).

3.  Have a variety of anchoring material and equipment available, such as utility straps, webbing, extra rope shorts, carabiners, tri-links, etc. Lay out limited amounts of this equipment.

4.  Here are the rules:

• For each rotation, define the type of system to be built (lowering, static or belay) and the type of anchor system such as: bombproof, substantial (multi-point) or self-equalizing.

• After each rotation, participants must give up a piece of equipment they used (i.e., if they used utility belts as anchors, remove the belts from available equipment for the next rotation).

• Repeat as many times as participants can come up with solutions as you switch between anchor types, systems and available equipment.

5. With a little planning, you can come up with an order and number of rotations possible along with an equipment list that should end with just the rope and a device. This drill can be adjusted to help newer team members better understand rigging principles and techniques, or to challenge more experienced team members based on the number and type of rotations and equipment available.

6. Another way to challenge more experienced team members is to limit the knots to be used by providing a master list of knots. Then, eliminate a knot from the list after it has been used.

This drill will help new rescuers better understand their options while taking a good anchor rigger to the next level.


Next in this series: QUICK DRILL #8 - Petzl ID

QuickDrill-08


Roco QUICK DRILL #6 - Splitting One Rope Between Two Systems

Wednesday, January 28, 2015

Roco QUICK DRILL #6 - Splitting One Rope Between Two SystemsAt times, it may be necessary to use a single rope split between two different rescue systems. This can be useful when all ropes are being used for other purposes, such as taglines, extending anchors, etc. Being proficient in using a single rope between two systems helps spread the resources and may be more than just another tool in your toolbox. Someday, it could be crucial to a successful rescue!
Here’s the drill:

1.  Choose an elevated location that is less than one half the length of the rope – plus, allow a good margin of extra rope. For example, if using a 150 ft. rope, you could use a platform that is about 40 feet high.

2.  Select two appropriate anchor points near each other. One will be for the main line; the other for the safety.

3.  Build a lowering system using one end of the rope and the main line anchor. Anchor the descent control device and prepare for a lower.

4.  Build your safety line using the other end of the rope and the second anchor.

5.  Lower the rescuer, package your patient, and recover them both.

6.  Try doing this using different descent control devices and different types of systems (piggy back vs. Z-rig). Play "what if" and problem solve.


Tips/Hints:

•  Pre-measure your lines. We say start where you want to end up! This drill is nothing more than lowering the end knots to the ground to assure you have enough rope to do the lower. It also allows you to inspect the rope for damage before life loading the lines.

•  If you do this with both ends of your rope and you have enough rope to reach from the ground to your two anchor points independently, you now know you have enough rope for both the mainline and safety line system.

•  Any additional line left between the two systems can be used to extend anchor points, rigging or build mechanical advantage systems.

•  Many times we use this technique of splitting rope from a single rope bag as our safety/retrieval line for rescue entrants during confined space rescue. We use rope bags that allow us to work from either end of the rope easily. We take two different color ropes usually 125 ft., tie them together, and load the bag from both ends with the knot in the middle (double fisherman). This allows us to run safety lines to two rescuers out of one bag. Since each rope is a different color it helps with line management, communications, identification and emergency retrieval. If your rescue scenarios require entrants to advance more than 125 ft., then longer ropes can be substituted. The rope can also be used as a single 250 ft. safety line provided you have knot passing capabilities.

•  Manage your ropes! Without good rope management, your work area can easily turn into a tangled mess.


This drill forces rescuers to think ahead and “outside the box” in order to allocate appropriate lengths of rope for each system or how to better use limited equipment resources. It is an excellent exercise in efficiency, rope management, and housekeeping – while demonstrating the importance of each when managing this type of system.


Next in this series: QUICK DRILL #7 - Anchor Selection and Rigging

QuickDrill-07


RescueTalk™ (RocoRescue.com) has been created as a free resource for sharing insightful information, news, views and commentary for our students and others who are interested in technical rope rescue. Therefore, we make no representations as to accuracy, completeness, or suitability of any information and are not liable for any errors, omissions, or delays in this information or any losses, injuries, or damages arising from its display or use. All information is provided on an as-is basis. Users and readers are 100% responsible for their own actions in every situation. Information presented on this website in no way replaces proper training!