<img height="1" width="1" src="https://www.facebook.com/tr?id=3990718177617800&amp;ev=PageView &amp;noscript=1">

Is the Petzl Maestro Good for Industrial Rescue?

Monday, November 16, 2020

By Brad Warr, Roco Rescue Chief Instructor

Question: “I noticed that some mountain rescue teams are making the switch to the Petzl Maestro descent device – is this something an industrial rescue team should consider?”

Thanks for the great question. It’s been almost a year since the Petzl Maestro has been on the market, and we have noticed a big uptick in back country teams adopting the Maestro as their primary anchored descend control device. In fact, many of our instructors’ own home-based rescue teams have already made the switch to the Maestro and many of these teams respond to mountain rescue calls.

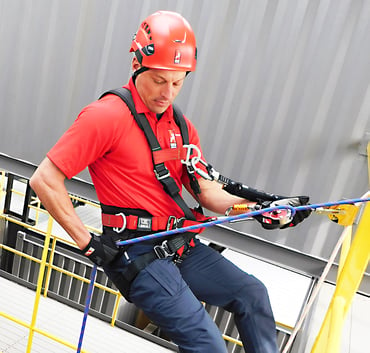
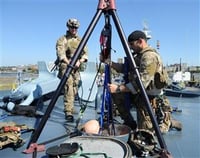
Petzl_Maestro_RocoTrainingCenter_1To decide whether the Maestro would be a good choice for an urban/industrial rescue team, let’s look at why a mountain rescue team would choose the Maestro. Mountain and back country rescue teams covet light weight, easily transportable equipment. Smaller diameter ropes, lightweight carabiners, pulleys and rope grabs are the norm when you must pack in your own gear. Anyone that has hefted a Petzl Maestro would never consider the device to be petite. At nearly two and a half pounds, the device is far from the featherlight kit usually found in back country response packs. Yet despite the rotund nature of the device, it continues to find its way into the equipment caches that ride on the shoulders of mountain rescue teams. That says a lot about how these teams feel about the Maestro’s performance.
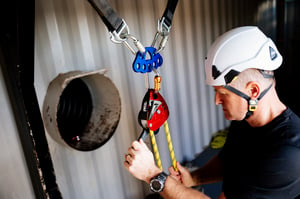
The “intuitive nature” of the Maestro is one of the descender’s strong suits. This is also one of the reasons we chose it for use in our new entry level Roco Urban/Industrial Rescue Essentials™ course. Often attended by brand new rescuers taking their first steps into technical rescue, the Maestro was the perfect fit. At the completion of the first 50-hour course, all Roco instructors commented on how much easier it was to train new rescuers to use the Petzl Maestro compared to other popular descent control devices. It allowed our students to progress quickly while increasing their safety as well.

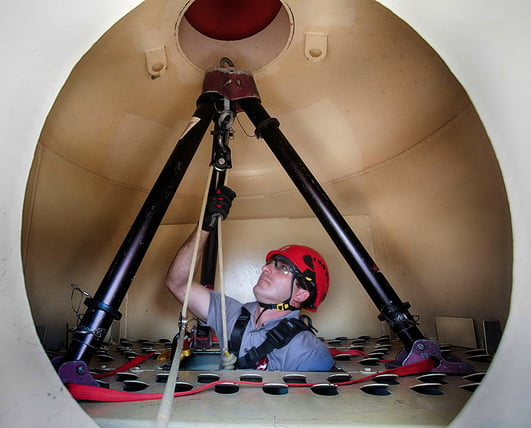
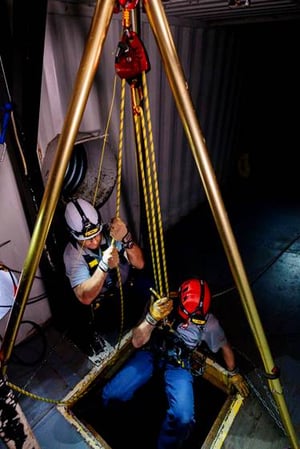
Petzl_Maestro_RocoTrainingCenter_2Mountain rescue teams are also very aware of the corollary between “friction management” and system efficiency. When you are working in small teams with potential for lots of friction running over rock and dirt, a device that can greatly increase friction reduction during hauls is very appealing. The Maestro delivers friction reduction in spades. The faceted sheave in the Maestro delivers up to 95% pulley efficiency.

The Maestro’s ease of use, consistent control and efficient operation were a few of the reasons we chose it for our courses. While Roco’s advanced classes delve into other personal and anchored descenders, we feel the Maestro gives the highest likelihood of success for new and experienced rescuers. The Petzl name behind the device gives us confidence in its dependability.

As an Urban/Industrial rescuer, we can take the experiences of top mountain rescue teams in the country to heart. If they are willing to carry the extra weight of the Maestro based on its performance, then perhaps we should carefully consider the Maestro as our primary choice for descent control.

To learn more about the Petzl Maestro, read our full review or join us for one of our newly designed rescue courses for 2021. Roco’s new Urban/Industrial Rescue Essentials™ 50-hour entry level course strives to create rescue team members that can contribute from Day 1.

Check out our current open-enrollment course schedule for upcoming training dates, or review our complete course descriptions to find the right course for your needs.


Brad Warr

Brad Warr is a Chief Instructor for Roco Rescue and a Captain at the Nampa Fire Department. Brad joined Roco Rescue in 2003, teaching a wide variety of technical rescue classes including rope rescue, confined space rescue, trench rescue, and structural collapse. Brad became a firefighter for the Nampa Fire Department in 1998 and was promoted to Captain in 2006. Before joining the fire department, Brad worked for three years as an Emergency Response Technician for a large computer chip manufacturer in Boise, Idaho, where he was responsible for OSHA compliance, emergency medical response, confined space/rope rescue response and hazardous materials response.

Q&A: Energy Absorber Systems and Safety Lines

Friday, September 28, 2018

Q&A: Energy Absorber Systems and Safety LinesREADER QUESTION: 
Is an energy absorber system needed on the safety line to help limit the impact forces should the belay system be engaged to arrest the falling load?

ROCO TECH PANEL ANSWER: 

Thank you for your question. Roco uses traditional untensioned safety lines in most all of our rescue systems, and we do indeed incorporate an energy absorber (shock) in those belay systems. While OSHA does not address specifics when it comes to rescue systems, there is some overlap from the OSHA as well as the ANSI standards that is helpful when considering the belay system during rescue. 

NFPA 1006 Standard for Technical Rescue Personnel Professional Qualifications, sections 5.2.9 through 5.2.11, provides guidance for the construction of a belay (safety line) system. Specifically, the 5.2.11 objective statement calls for the belay system to ensure “the fall is arrested in a manner that minimizes the force transmitted to the load.” The annex information to 5.2.9 adds: “A.5.2.9 Belay systems are a component of single-tensioned rope systems that apply a tensioned main system on which the entire load is suspended and a non-tensioned system with minimal slack (belay) designed, constructed, and operated to arrest a falling load in the event of a main system malfunction or failure. 

While these traditional systems used for lowering and raising are in common use, two-tensioned rope systems can also be used to suspend the load  while maintaining near equal tension on each rope, theoretically reducing the fall distance and shock force in the event of a singular rope failure. To be effective, two-tensioned rope systems must utilize devices that will compensate appropriately for the immediate transfer of additional force associated with such failures.”

Additionally the NFPA 1006 definition of belay is “3.3.9* Belay. The method by which a potential fall distance is controlled to minimize damage to equipment and/or injury to a live load.” And Annex information “A.3.3.9 Belay. This method can be accomplished by a second line in a raise or lowering system or by managing a single line with a friction device in fixed-rope ascent or descent. Belays also protect personnel exposed to the risk  of falling who are not otherwise attached to the rope rescue system."

So, where can OSHA help in all of this? OSHA requires the maximum force of a fall arrest system not to exceed 1,800 pounds. ANSI is more protective and requires arresting forces not to exceed 900 pounds. NFPA does not state what the arresting forces need to be limited to, but the performance measurement is to “minimize damage to equipment and/or injury to a live load.” OSHA and ANSI have already done the homework on this and stated their performance requirements. One proven way to meet NFPA 1006 as well as OSHA and ANSI requirements is to incorporate an energy absorber in the belay (fall arrest) system. Whether 1,800 pounds or the ANSI required 900 pounds is appropriate, or if you use a two tensioned system, this is up to your AHJ. 

Inspection Process for Roco Training Ropes

Tuesday, August 28, 2018

Inspection Process for Roco Training RopesQuestion: We recently had a student ask how our training rope is monitored for wear and tear because of its extensive use...

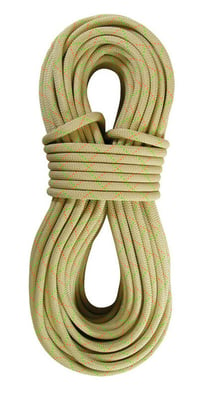
Answer: Good question, and it’s a big job for us, no doubt. We’ve used and inspected a lot of rope in the past 35+ years, but this aspect of life safety can never be overlooked or taken lightly. As always, we urge everyone to carefully follow the care, use and inspection guidelines provided by their rope manufacturer. For added safety and as standard practice, we also use secondary back-up ropes and hardware in all field activities. 

Because we train thousands of students per year, we must accept the fact that there are numerous opportunities for our ropes to be exposed to wear such as being stepped on or exposed to dirt and gravel. It is for these reasons that we perform rigorous inspection of the ropes before and after use. Plus, we also conduct an annual competent person equipment inspection as recommended by NFPA.
 
As added safety, we also expect our students to do their part in monitoring the equipment during a class, and that’s why we’re glad you brought this up.
We teach and enforce rope care and inspection of all equipment, including ropes, in all of our classes. Inspections are accomplished at multiple times during any given class including during inventory. Additionally, all equipment is inspected by a Roco employee at the conclusion of each class. If there are any signs of damage or degradation that would render the rope unserviceable according to the manufacturer’s instructions for use, that rope will be taken out of service.

Of course, we’ve seen some rope damaged over the years, which is to be expected with the use our rope receives. However, to my knowledge, we’ve never had a rope failure. We’ve seen cut sheaths and sheath slippage, evidence of broken core fibers, and other damage that failed the rope inspection. But, not once, have we had a rope fail while it was being used to support a life load. The construction and the minimum breaking strength requirements of life safety rope provide a very substantial margin of safety. And, there again, we also have the redundancy of a back-up system in place.

All manufacturers of life safety rope are required by NFPA 1983 (2017 edition) to provide the following inspection criteria information in their instructions for use:

(1) Rope has not been visually damaged.
(2) Rope has not been exposed to heat, direct flame impingement, or abrasion.
(3) Rope has not been subjected to impact load.
(4) Rope has not been exposed to liquids, solids, gasses, mists, or vapors of any chemical or other material than can deteriorate rope.
(5) Rope passes inspection when inspected by a qualified person following the manufacturer’s inspection procedures both before and after each use.

The following inspection tips are provided by PMI Life Safety Rope:
Inspection Process for Roco Training Ropes

HOW TO INSPECT YOUR ROPE

LOOK AT IT.... ALL OF IT!
Start at one end and look at every inch of the rope. Watch for signs that might indicate possible damage such as discoloration, chemical odors, abrasion, cuts or nicks in the outer sheath and visible differences in the diameter of the rope in one area in relation to the rest of the rope.

WRAP IT IN SMALL LOOPS AND LOOK!
Wrap the rope around your hand to form small loops at different random points along the ropes length. Look at these small loops as you make them, the consistency of the loop should be uniform throughout. If it’s not, you might have a problem with the rope’s core.

FEEL THE ROPE!
While you are looking at every inch of the rope, run it through your bare hands and feel it for changes that might indicate damage to the core. Changes may include any inconsistencies in rope diameter, soft or “mushy” spots, or extraordinarily stiff areas.

WRITE IT ALL DOWN!
Write the results of your inspection on the Rope Log included with your rope. Be sure to include anything you found in your inspection that might be or become a concern and document other important information about the rope such as an occurrence of uncontrolled or excessive loading, rope older than 10 years, contact with harmful chemicals, and history of use.

IF IN DOUBT, THROW IT OUT!
If you are not sure about the integrity of a rope........DON’T USE IT!
Consult the manufacturer if you need help.

So, thank you again for asking about the rope used continuously in our training programs. Even with our many years of experience, we do not take rope safety margins as a license to misuse our ropes. And that is why we are diligent in caring for and inspecting all of our equipment including the ropes. 

Why Use a High-Point Dorsal Connection Point?

Friday, July 6, 2018
Why Use a High-Point Dorsal Connection Point?

We recently had a Facebook inquiry about attaching a rappeler's belay line (safety line) to their high-point dorsal connection on their harness. We choose to do this for a number of reasons including: (a) compliance with applicable regulations; (b) adherence to safe and practical rescue procedures; and, (c) the physiological effects of falls – how the body absorbs an impact force. Let’s take a general look at these considerations.

Compliance

OSHA considers our rappel/lower main lines as “work positioning” lines and our belay or safety lines as “fall protection.” The fact that they and we, as rescuers, consider the safety line as fall protection, or more accurately as our Personal Fall Arrest System (PFAS), kicks in a few requirements and considerations for all private sector responders and for municipal responders governed by OSHA-approved State Plans. These responders are required to comply with applicable OSHA regulations.

However, keep in mind, these regulations are designed to protect workers (and rescuers) from harm and injury. During training, since it is not a real rescue, we should be following the applicable regulations and standards for safety as well as liability reasons. Even during actual rescues, it is important to adequately protect our people from injury. The days of “rescue at all costs” are gone. We are responsible for designing training, systems and SOPs/SOGs that protect our people in a rescue situation.

Note the following key points from OSHA 1926.502(d):

• Limiting the free fall distance (max free fall 6 feet)
“…be rigged such that an employee can neither free fall more than 6 feet (1.8 m), nor contact any lower level”

• Deceleration distance of 3.5 feet (41 inches)
“…bring an employee to a complete stop and limit maximum deceleration distance an employee travels to 3.5 feet (1.07 m)”

• Maximum allowable impact load 1,800lbf.
“…limit maximum arresting force on an employee to 1,800 pounds (8 kN) when used with a body harness”

• Improvised anchorage strengths of 5,000lbf or twice the anticipated load.

“Anchorages used for attachment of personal fall arrest equipment shall be…capable of supporting at least 5,000 pounds (22.2 kN) per employee attached…”
“Have sufficient strength to withstand twice the potential impact energy of an employee free falling a distance of 6 feet (1.8 m), or the free fall distance permitted by the system, whichever is less.”

• Harness attachment should be to the high-point dorsal connection point.

“The attachment point of the body harness shall be located in the center of the wearer's back near shoulder level, or above the wearer's head.”

You may have heard the statement, “Firefighters/rescuers don't need fall protection or need to follow OSHA.” This is not true for the 27 State Plan states where OSHA regulations do apply to public sector employees including emergency responders. It puts the burden on the employer, agency or department to establish fall protection and rescue protocols that would adequately protect their people.

To illustrate this, here is an excerpt from an article written by Stephen Speer, a NY career firefighter, for “Fire Rescue” magazine which deals with potential OSHA violations during rescue operations and training exercises. (Note: New York is a State-Plan state.)

“I spoke to a New York State Public Employee Safety & Health (PESH) supervisor about the following scenario and asked if there were areas that could be potential violations.

Scenario: A firefighter operating from a roof ladder is cutting a ventilation hole on a pitched roof. The firefighter falls from the roof and is injured.

In what areas, if any, could an incident commander or company officer be cited? In response, I received 12 pages of documentation. The documents showed that in evaluating potential violations of the general duty clause to see if anyone is responsible, the following four elements must be met:

1. The employer failed to keep the workplace free from a hazard to which employees of that employer were exposed.
2. The hazard was recognized.
3. The hazard was causing or likely to cause death or serious physical harm.
4. There was a reasonable and adequate method to correct the hazard.
 

NFPA 1500, chapter 8.5.1.1, states that operations should be limited to those that can be completed safely. In this scenario, there is the potential for citation if all four elements apply. As the above scenario illustrates, whether or not you have an aerial apparatus, you must consider fall arrest protection.”

Practicality

When rescuers are sent into a vertical confined space, we use the safety line (PFAS) to protect them as they are being lowered and raised from the space. It is also used as “an immediate means of retrieval” should something go wrong inside the space. Having the safety/retrieval line attachment point at the high-point dorsal position allows us to attempt an emergency retrieval with the victim being extracted in a low profile to fit through a narrow portal.

Physiological Effects

There have been numerous studies on the effects on the body when subject to a fall and arrest while in a harness. They generally come to the same conclusion that high-point dorsal attachment is the most survivable and provides for the greatest injury reduction. Here are excerpts from two studies.

1) Excerpt from a study conducted by Dr. M. Amphoux entitled, “Exposure of Human Body in Falling Accidents,” which he presented at the International Fall Protection Seminar in 1983:

In experiments on the position of the attachment point on the harnesses, Amphoux found that a high attachment point was preferable because “it gave a better-disposed suspension” and that it was “especially effective when the attachment is on the back. When the falling stops, the neck flexes forward. If the attachment point is in the front of the sternum, the neck flexes backwards and the lanyard may strike the face.”

Amphoux continued that it would be better for the compression to be localized on the body of vertebrae and not on the posterior joints, which were too fragile. “Therefore,” he said, “the attachment point would be better on the back than pre-sternal and should be high enough to reduce the potential neck injury. In addition, the forward flexion would be stopped by the thrust of the chin on the chest.”

This was why Amphoux and his colleagues strictly recommended attachment high on the back. It also protected the face from the lanyard when falling. In the case of falling head first, regaining a feet-first position would involve flexion of the head, whereas if the attachment were pre-sternal, the head would more often be projected backwards [whiplash effect].

However, it was accepted that a front attachment might be preferred in a few working situations. This was only acceptable when the height of the potential fall was very short. Whatever the choice of body support, it should not be forgotten that it was only a compromise and not a guarantee of absolute security.

2) Excerpt from “Survivable Impact Forces on Human Body Constrained by Full Body Harness,” HSL/2003/09 by Harry Crawford:

The one-size-fits-all policy of some harness manufacturers may not be suitable for the range of body weight 50kg to 140kg. Although it may be possible for those in the wide range of body weight/size to don such a harness, the position of the harness/lanyard attachment is of paramount importance. For best performance and least risk of injury, the attachment should be as high as possible between the shoulder blades.

Note: They also concluded that the shorter the fall, the less impact and less chance of injury no matter which type of harness or where the connection point was.

Conclusion

Like any rescue or work safety technique, you need to look at all the variables and decide which technique and equipment will best protect you or your co-workers. We choose the high-point back connection because of the variety of situations and locations we might face during a rescue based on the three considerations mentioned earlier in this article.

Thanks for a great question and taking the time to look into the reasons why systems or techniques are used. I hope this answers your question. If you have additional questions, please contact me at 800-647-7626.

By Dennis O'Connell, Roco Director of Training

Job Assignments and Rescue Duties

Wednesday, May 2, 2018

Job Assignments and Rescue DutiesQUESTION: Should industrial rescue team members be informed of any scheduled confined space entries at the beginning of their shift?

ANSWER: While OSHA does not mandate that individual team members be notified; common sense and best practices do. Here’s our reasoning for encouraging this “information sharing” at the beginning of each shift.

First of all, it is the Entry Supervisor’s responsibility to ensure that the rescue service is available prior to each PRCS entry. This verification should be performed in a way that confirmation of availability can be documented. There are various reasons that the in-house team may not be immediately available, so it’s up to the Entry Supervisor to plan ahead and coordinate with the team. Most often in-house industrial rescue team members have regular job assignments in addition to their rescue duties. Depending on the particular assignment, he or she may or may not be available to respond to a rescue emergency. In fact, we have heard of incidents where the Entry Supervisor just “assumed” that because the facility had an in-house rescue team that the team would always be ready to respond. In one instance when an in-house team was notified of a PRCS emergency, only one (1) team member was on shift and available to respond. Apparently, other team members were on sick leave, vacation, or at shift change. As you can see, two-way communication between the Entry Supervisor and the rescue service is a must!

Having a system in place that allows on-duty team members to be aware of PRCS entries that are scheduled during a given shift allows them to start the preplan process, which will help reduce response and preparation times. It also provides Team Leaders (IC) with a better understanding of possible rescue needs and how best to utilize available resources if an emergency situation should arise. And, these are just some of the reasons we recommend that on-duty team members be accounted for and be made aware of any entries occurring during their shift - including the location, the type of entry and the hazards involved. It simply provides for better preparation; thus, making everyone safer.

RescueTalk™ (RocoRescue.com) has been created as a free resource for sharing insightful information, news, views and commentary for our students and others who are interested in technical rope rescue. Therefore, we make no representations as to accuracy, completeness, or suitability of any information and are not liable for any errors, omissions, or delays in this information or any losses, injuries, or damages arising from its display or use. All information is provided on an as-is basis. Users and readers are 100% responsible for their own actions in every situation. Information presented on this website in no way replaces proper training!