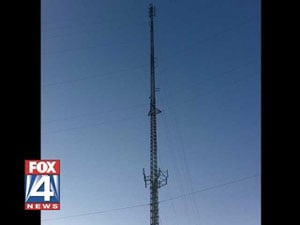
<img height="1" width="1" src="https://www.facebook.com/tr?id=3990718177617800&amp;ev=PageView &amp;noscript=1">

How to Haul a Victim in Half the Time: Part 1

Thursday, May 12, 2011

How to Haul a Victim in Half the Time: Part 1As anyone who has ever been summoned to an industrial site for a confined space rescue, or has taken the opportunity to practice rescue drills in these facilities knows, sometimes the working area for the rescue team can be a tad cozy.  By “cozy” we mean cramped.  If there is the need for a haul of the rescuers or victim after a lower, these cramped conditions can cause multiple problems.  Consider it a challenge to overcome, and use your rope rescue know-how to come up with an efficient solution that will not only reduce congestion at the working area, but will most likely provide for a much faster haul of the rescue package.

First of all, if the space lends itself to a vertically mounted block and tackle, the problem is greatly reduced.  However, if there is no overhead anchor available and the use of a portable overhead anchor such as a tripod is not feasible then a “lane” for the haul team may be necessary.  At times, even the use of a vertically mounted block and tackle may require a solution to a congested working area.

Sometimes we are confronted with a very short throw between the mechanical advantage anchor point and the edge of the portal.  This may cause multiple resets of the haul system, be it a piggyback system or a Z-Rig.  These short throws with multiple resets will really slow down the progress of hauling the rescue package and can become a significant hazard when the need for rapid retrieval is needed.

How to Haul a Victim in Half the Time: Part 1If the opportunity presents itself, take advantage of a simple change of direction on the haul system.  At times, a single 90-degree change of direction can convert a short 3-4 foot throw into a throw many times longer.  We see this all the time on catwalks, yet it is often overlooked by our rescue teams when we throw scenario-based training evolutions at them.  Yes, it does require some extra equipment which typically amounts to a single sheave pulley, a carabiner, and a utility strap.  It also adds some frictional losses at that directional pulley, but the advantage gained by extending the throw from 3-4 feet to 20 or more feet, far outweighs the disadvantages of extra equipment, added friction, and time needed to make the change.

If a single change of direction doesn’t quite solve the short throw problem, consider two, or even more changes of direction in order to position the haul team in an area thatthey can “walk the haul” using their leg strength instead of being bunched up and using their arm strength only.  Of course, it gets to a point where too many changes of direction exhausts the equipment cache or creates so much friction that any advantage is lost.

As in any rescue situation, a good cohesive team is a great benefit.  If the situation causes the team to be bunched up on top of each other, remember to scan the area for an opportunity to open things up a bit.  Sometimes that change of direction does wonders for the ability of the team to take full advantage of their strength in numbers, and creates a situation where if needed, speed can be a lifesaver.

The author, Pat Furr, reporting for duty...
How to Haul a Victim in Half the Time: Part 1

Guidelines for Permanent Marking of Rescue Hardware

Friday, April 29, 2011

One of the most reliable ways to ensure that your rescue team is able to identify, and if needed, prove ownership of its equipment is by marking the gear with some type of visible identification. There are many ways to accomplish this ranging from color-coded paint or vinyl tape to affixing tags. Each has its shortcomings in terms of durability – and tags could potentially interfere with the function of the item. Here are some additional guidelines from our hardware manufacturer, SMC. For more than 40 years, it has been SMC’s goal to design and manufacture innovative gear that sets the standard for quality, reliability, and functionality.

The following information is intended to serve as a clear and simple guide concerning what is acceptable and conversely, what is not acceptable, when permanently marking by engraving into the surface of various types of hardware. Note: Always adhere to your equipment manufacturer’s instructions.

First of all, it’s very important to note that it is only acceptable to use a “hand-held” electric type engraver to place identifying marks on hardware. Do NOT strike with a hammer or stamps or ever use other similar methods. Once the marking process has been completed, ALWAYS inspect the product for proper fit and function PRIOR to returning it to service.

Carabiners:

For carabiners, it is recommended to mark along the spine of the frame. Do NOT mark on or near the lock or pivot tabs of the frame and stay away from rope bearing areas. Do NOT mark on the gate! For steel and stainless products, use a medium setting with medium to heavy pressure. For aluminum products, use a low setting with light to medium pressure. Depth of engraving equal to the thickness of a piece of paper should be enough to last the life of the product.

Pulleys:

For pulleys, it is recommended to mark on the flat outside surface around the axle. Do NOT mark ON OR NEAR the carabiner hole at the top of a pulley or anywhere on the becket of a double pulley. It is also important to stay away from all rope bearing areas.

Rappel Racks & Bars, Rigging Plates & Rope Protection:

When marking other hardware, always use caution and stay away from all carabiner holes, rope bearing surfaces and surrounding areas.

Coatings:

Most aluminum products are anodized. Some slight cosmetic oxidation may occur over time and this is a natural occurrence. Alloy steel parts are typically zinc plated. Engraving these products will remove the zinc plating in that particular area. One advantage of zinc plating is that it will move over and protect the exposed base material (self-sacrificing). However, this will eventually lead to the zinc in the area being consumed and may allow rust to begin to form. To help prevent corrosion, periodically wipe down plated products with LPS or a similar product.

As durable as modern rescue hardware is, it is important never to use any permanent identification method that would compromise the structural integrity of the item. With the clear guidelines provided by SMC, it allows the owner to have a reliable means of identifying their rescue hardware, while at the same time maintaining the original integrity of the item.

We remind you that it is important to review the user information and instructions for use for any rescue equipment item to ensure that the procedures outlined above are not conflicting with another manufacturer’s guidelines. Roco strives to provide practical and useful information to the rescue community, and this is one in a series of postings that we hope will help you become a better rescuer.

Additional Resources

gear-checklist

Gear Inspection Checklist (download)

How often should I replace my rescue harness?

Rope Care & Cleaning Tips


5 Thought Starters for Rescue Team Practice Drills

Tuesday, April 19, 2011

5 Thought Starters for Rescue Team Practice DrillsIf you’re the one who’s responsible for setting up proficiency training for your team, ask your team members to come up with some ideas that are different from your typical drill. You might be surprised with what they come up with. If you’re a team member, approach your training manager with some suggestions to change things up a bit. Once the idea is planted and your team starts to run a variety of training scenarios, the idea will catch on. In fact, team members may try to “outdo” each other on coming up with the next new scenario.

Here are some suggestions to get you started:

1.  Dig deeper into your equipment kits. Is there a piece of gear that is gathering dust? Some of the old tried-and-true pieces still have a lot of value. See if incorporating them into your next training session rekindles the thought that it was good back then and it still has a place today.

2.  Call some of your neighboring plants (or agencies) to see if they have a situation that is different from what you have. Do a little brainstorming over the phone and then re-create the situation during a train up.

5 Thought Starters for Rescue Team Practice Drills

3.  Review NIOSH Fatality Assessment and Control Evaluation (FACE) Program Investigations to see if there are lessons to be learned. There will be. Try to identify incidents that have similar space configurations and associated hazards as you may be summoned to.

4.  Do a thorough review of your existing rescue plans. Are they current? Have there been new spaces installed or reconfigured that would make existing rescue plans ineffective? If so, update the plans and practice any new procedures that the new plans may have generated.

5.  Sign up for Roco’s Rescue Challenge. This is a great opportunity to share ideas with other rescuers and learn new ways to approach your rescue response. It also satisfies annual practice requirements for individuals, and rescue teams. 
 

Rescue I-Plus Class Photo

Friday, April 15, 2011

We had a great group at the March, Rescue I-Plus open-enrollment class in Baton Rouge. With 30 students from Louisiana to Alaska, the class was a great learning experience as well as a lot of fun. Roco Instructors for this class included Chief Instructor Russ Kellar (Austin) , Rob “Soup” Campbell (Baton Rouge); Bob Kauer (New York); Brent Glidden (LaPlace, LA); and Keith Pridgen (El Dorado, Arkansas).

Rescue I-Plus Class Photo

Rescue Plans…What is required?

Tuesday, April 12, 2011
RescuePlans-01

We had a very interesting inquiry regarding OSHA’s requirements for rescue plans and wanted to share it with you.

Reader’s Question: Does OSHA 1910.146 (k)(1)(v) state that a plan must be developed by a rescue service before an entry can be made? Can entries be conducted with the understanding that a rescue service has the competence to rescue someone without seeing the space prior?


Section (k)(1)(v) of the regulation states that the employer shall…“Provide the rescue team or service selected with access to all permit spaces from which rescue may be necessary so that the rescue service can develop appropriate rescue plans and practice rescue operations.” [Emphasis added]

First of all, it’s important to note that the term “plan” as used in safety-related regulations and standards such as the Permit-Required Confined Space (PRCS) standard, can have a more general meaning than what rescuers typically think of when they refer to “rescue preplans.” When rescuers refer to “rescue preplans,” what usually comes to mind is a very specific, detailed plan for rescue from a particular space.

Although the regulations do not specifically state that a “plan must be developed by a rescue service before an entry can be made,” the regulation assumes that a properly selected (and evaluated) rescue team or service will develop appropriate rescue plans, and requires that rescuers be given access as necessary to develop those plans. OSHA makes it very clear, however, in Non-Mandatory Appendix F, the Preamble to the Final Rule, Summary and Explanation of the Final Rule, and its Compliance Directive on Permit-Required Confined Space, that it interprets the regulation to require rescue plans. [See links below.]

How specific a “rescue plan” must be in order to meet OSHA requirements can be determined by answering this question…“How detailed must the rescue plan be to enable me to safely perform a timely rescue from the permit-required confined space being entered?” Generally speaking, the simpler and more generic the space and the entry, the simpler and less detailed the plan must be. The more complex the space and the hazards, the more specific and detailed the plan must be. And, the more likely the rescue service should see the space and/or a representative space in advance.

As such, the degree and content of the rescue plan should be determined by the rescue service – and it must be provided access to do so. Ultimately, however, it is the employer’s responsibility to perform an adequate evaluation of the prospective rescue service. The viability of the rescue plan should be demonstrated; therefore, proving that the rescue service is staffed, equipped, available, and proficient in performing timely rescue from that particular space (or representative space). The employer must be confident that the rescue service can “Talk the talk, and walk the walk.”

When evaluating the capabilities of a rescue service, Non-Mandatory Appendix F provides guidelines for doing so and specifically references “rescue plans” for the types of spaces involved. It is also important for employers to note that while it is “not mandatory” that the evaluation is performed in exactly the same way; you still have to reach the same result. In other words, it is a non-mandatory means of meeting the mandatory requirements.

Section B (1) of Appendix F asks…
Does the rescue service have a plan for each of the kinds of permit space rescue operations at the facility?

Is the plan adequate for all types of rescue operations that may be needed at the facility?

Note: Teams may practice in representative spaces, or in spaces that are ‘worst-case’ or most restrictive with respect to internal configuration, elevation, and portal size.

Appendix F also offers recommendations for determining whether a space is “truly” representative of an actual space. [See link below.]

You can also refer to Roco’s Confined Space Types Chart (click here to download) which illustrates various confined space types for rescue practice and planning purposes.

In summary, prior to permit required entry operations, the employer must afford the selected rescue service access to the permit spaces they may respond to for the purposes of rescue planning.  The degree and content of the rescue plan should be determined by the rescue service. The rescue service must be prepared and proficient in rescue from the “same type(s) of confined spaces” in terms of configuration, access, and hazards.

IMPORTANT: The information in Roco Rescue Online is provided as a complimentary service for emergency response personnel. It is a general information resource and is not intended as legal advice. Because standards and regulations relating to this topic are typically performance based, and compliance with those standards and regulation is often dependent on the specific circumstances and conditions at hand, it is always important to carefully review all relevant standards and regulations, and to follow the proper protocols specific to your company or agency.

ONLINE REFERENCES:


OSHA 1910.146 Appendix F.

OSHA CPL 02-00-100, 5/5/1995, Application of the Permit-Required Confined Spaces (PRCS) Standards, 29 CFR 1910.146  Appendix D, V. Rescue, D. Combinations: 1. a.

OSHA 1910.146 Permit-Required Confined Spaces, Section: 2, II. Summary and Explanation of the Final Rule

RescueTalk™ (RocoRescue.com) has been created as a free resource for sharing insightful information, news, views and commentary for our students and others who are interested in technical rope rescue. Therefore, we make no representations as to accuracy, completeness, or suitability of any information and are not liable for any errors, omissions, or delays in this information or any losses, injuries, or damages arising from its display or use. All information is provided on an as-is basis. Users and readers are 100% responsible for their own actions in every situation. Information presented on this website in no way replaces proper training!