<img height="1" width="1" src="https://www.facebook.com/tr?id=3990718177617800&amp;ev=PageView &amp;noscript=1">

Rescue Toolbox: Portable Anchors

Thursday, August 9, 2018

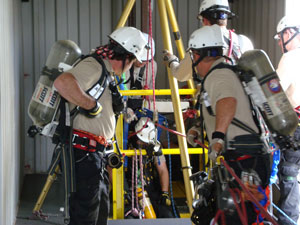
PJs use a tripod to extract a patient from a confined space.Portable Anchors – Bipods, Tripods, Gin Poles, and Quads

As rope rescue technicians, we learn early to look for that perfect high-point anchor. You know the one. It’s easy to sling, positioned perfectly in line with the portal and the rescue system, and rated for the anticipated load. We all know that they can be elusive, to say the least.

In locating high-point anchors, we learn to first look straight up for an anchor strong enough and high enough to allow us to clear a vertical litter out of a space (requires about 9 feet). Then we look left and right. Are there beams or substantial anchors high enough and positioned to allow a high-point bridle for our lift? Or maybe there’s an anchor positioned were we may be able to “cowboy” a rope up and over a beam and adjust our end-of-line knot at the appropriate height; and then tie it back to another anchor (extended anchor technique).

But what about those times where we need a high-point anchor, and there is nothing, nada, zilch? No beams, trees, nothing! That’s when we bring our own high-point, also called a portable anchor. 

Portable anchors come in a variety of configurations, the most common being tripods. Even tripods are not all created the same. Some are rated only for equipment, others have different allowable working loads, and they come in a variety of heights.

There is also the option for bipods, quadpods, monopods (gin poles) and some devices that can transform into all of these configurations. They can be centered over a portal for straight, vertical lifts (tripods/quadpods), straddle the plumb line (bipods), or provide a single high-point in an area with a small foot print (monopods). They can even be designed to cantilever out over an edge to provide a clear path for the ropes and ultimately the rescue package. Determining which one to use would be based on your team’s needs and your type of response area.

So, let’s talk about some of the portable anchors that we like to use, including their capabilities and limitations.

Tripods

Rescue Toolbox: Portable Anchors

The SKED-EVAC® Tripod is a simple tubular aluminum tripod with cast header and feet. It extends to a maximum height of 10 feet at the anchor connection points, which gives a good bit of clearance for vertical litters to clear the bottom edge. At full extension (10 feet), the tripod is proof loaded to 5,280 pounds. The SKED tripod is simple to set up, includes a chain to run through the feet to keep the load stresses off the cast header, includes three anchor points, and adjusts in height for situations where there isn’t enough headroom for full extension.

Eccentric Loading and Resultant Forces

Tripods as well as other portable anchors must be respected when it comes to the “direction of pull” on the rescue system and the relationship to the position of the load. Here are a few terms to be familiar with:

Axial loading: The object is loaded in line with the normal fixed axis point (the center of a tripod, equal force on all legs).
Eccentric loading: The load is no longer axial and is offset from the axis point. (The system puts side-load forces on the anchor, or the load is moved out from under the axis point.)
Resultant: This is the relationship between forces acting on an object. (It is the relationship between the load and the vectoring forces of the rescue system from the portable high-point; it is the bisection of this angle.)

The “rule of thumb” for tripods is the resultant forces must remain inside the footprint of the tripod. That is, if the rescue load is pulling straight down (plumb/axial), and the rescue system vectoring forces are angled outside of the footprint of the tripod, then where does the bisection of that angle fall?

Imagine drawing a circle that connects the legs of the tripod. As long as the load and the rescue system remain inside that circle, the resultant will be acceptable, and the tripod will remain axially loaded and not tip over.

There are some techniques to overcome this limitation such as a directional pulley located within the footprint of the tripod. Another technique, which we call the “Pass Through” method (see illustration at bottom), allows counter acting resultant forces to stabilize the tripod. If your haul line is angled too far outside the footprint of the tripod, or the load is moved outside the tripod footprint, the entire tripod is at risk of toppling over (eccentric loading), which could spell disaster.

So, to keep things simple, we often recommend that all lines are kept within the footprint or to add a low directional within the footprint. This provides a small margin for error when hauling or setting up a directional. Technically, you can set up the directional outside the footprint (or pull the haul line outside the footprint) as long as the resultant force is still inside. 

Just remember to envision all lines as though they were loaded before you load the system. We’ve seen plenty of low directionals that were set up perfectly; however, the anchor strap actually allowed them to fall outside the footprint once loaded. As we like to say, "keep it safe and simple!"(KISS) And to play it safe, keep all lines within the footprint.

Multi-Use Portable Anchors

Portable anchors have progressed way beyond the tried-and-true tripods. We are seeing some pretty versatile systems that can be configured as quadpods, bipods, even monopods. These modern systems provide capabilities that go beyond straight vertical lifts while straddling the hole or entry into the rescue subject’s location.

Rescue Toolbox: Portable Anchors

As with most devices that provide additional or alternate capabilities such as monopods and bipods, they are generally more complex and require additional training to fully understand the forces being applied. The ability to extend an anchor point out over the edge of a containment berm, or a cliff edge in a wilderness rescue, will greatly reduce friction on haul lines and reduce rope abrasion, providing clear movement of the rescue package coming up or going down over the edge. This is something that a tripod just cannot provide. But a better mastery of the effects and relationships of the forces being applied needs to be obtained. Understanding and identifying the resultant force is critical in these situations.

These new generation multi-purpose devices, such as the TerrAdaptor™ or the Arizona Vortex, are designed to be used as tripods, bipods, monopods; or in the case of the TerrAdaptor, as a quadpod. They are third party (UL) certified to NFPA 1983 in symmetric tripod and quad-pod configurations. In addition to the straight vertical capabilities, these devices also provide an “over-the-edge” capability. 

For tight areas such as on catwalks, the A-Frame configuration or bipod can provide that portable high-point where a tripod just can’t fit. For extremely tight quarters or when lightweight gear is needed, they can be rigged as a monopod or gin pole. This requires some advanced knowledge of rigging and tiebacks; but, rigged correctly, it provides high strength and a high-point in places no other system would fit.

Sometimes the configuration of the structure or the height of your portable anchor does not allow enough overhead to clear the foot-end of a vertical litter. In instances like this, you may need a simple mechanical advantage assist that is attached low on the litter, or a modified Pick & Pivot technique where the lifting point on the litter is changed from the head to the feet once the litter reaches an edge to allow recovery.

Rescue Toolbox: Portable Anchors

Smaller, Lighter, Stronger

To meet the demands of the USAF Pararescuemen (PJs), Roco worked with Skedco to develop the Roco Tactical Mini-Tripod. 

Reaching about 5 feet at maximum extension with removable legs, it is small enough to carry in the team’s rucksacks, if needed. Its short height also makes it the strongest rescue tripod on the market. Additionally, the removable legs provide the ability to use it as a bipod or A-frame.

Utilizing some simple techniques, a vertical litter patient can be removed from a space with the Roco Mini-Tripod just as easily as with a full-size.

The lighter weight, compact size, and full functionality allow teams with limited manpower and resources to operate without limited capabilities. (Note: in 2023, the Roco Mini Tripod was updated and replaced by Roco's Lowrider™ Compact Rescue Tripod.)

Conclusion

It is important to know what your needs are regarding portable high-point anchors. Complete your rescue preplans. And, if they reveal the need to cantilever out over an edge, or that a bi- or monopod may be required, you may want to consider a multi-functional, portable high-point system that provides capabilities beyond a tripod. Whichever device you choose, always make sure you get the proper training. The unexpected loss of a high-point during training or a rescue could be disastrous. So, be safe, know your equipment and know how to use it.

Check out our selection of tripods in our Gear Shop; or, if you need additional training, review our listing of courses. If you would like to speak with one of our instructors, please call us at 800-647-7626 or email info@RocoRescue.com

Here are several tripod techniques from our new Roco Pocket Guide:

Simple B&T M/A with bottom directional.

Rescue Toolbox: Portable Anchors 

High-point pulley & bottom directional used with piggyback or Z-rig M/A systems.

Rescue Toolbox: Portable Anchors 


Pass-through technique used with piggyback or Z-rig M/A systems.

Rescue Toolbox: Portable Anchors


New Pocket Guide from Roco

Monday, February 12, 2018

New Pocket Guide from Roco Newly revised and updated with 82-pages of color drawings and detailed illustrations, Roco's new Pocket Guide features techniques taught in our rescue classes. Made from synthetic paper that is impervious to moisture makes this pocket-sized guide the perfect reference during training or on the scene.

Pocket Guide features: Knots - Rigging - Patient Packaging - Lower/Hauling Systems - Tripod Operations - Low Angle - Pick-off Rescue - High-lines - Confined Spaces and much more.

Reference charts include: Confined Space Types, Suspension Trauma, and Rescue Gear Service Life Chart.

Click here to order your copy today!!

Rescue Toolbox: Petzl Rescucender

Wednesday, July 5, 2017

Rescue Toolbox: Petzl Rescucender The Rescucender is one more quality piece of rescue hardware for your toolbox. Roco is proud to have been one of the first rescue training companies approached by Petzl to be shown the new device and asked to evaluate it. We were excited to see and use it from Day 1, and we then added it to our training kits as soon as they became available.

There’s no doubt, as computer assisted design (CAD) and precision computer numerically controlled (CNC) machines are used more and more in designing and manufacturing new rescue hardware, we are seeing some absolute gems coming to market. And I say gems, referring to function as well as appearance. There are still times when stamping and casting hardware is appropriate, but if there is a good reason to machine a piece from solid aluminum stock, it generally results in a lighter, smoother, more precise piece of kit.

And that is the case with the new Petzl Rescucender. It is primarily machined out of solid forged aluminum with some bits that are manufactured in a more traditional manner. But the end result is one of those gems. I have been waiting for an NFPA-rated, one-piece mechanical cam for quite some time; and now it is here. My first experience with a one-piece cam was with another Petzl product known as the Shunt. The ease of loading it onto, and stripping it off, the rope made it so much faster and greatly reduced the chance of dropping it. This is especially important when 300 feet or more on a tower!

The limitations of the Petzl shunt made it inappropriate for most technical rescue operations except for certain specialized situations such as during rope access or tower rescue when we are generally dealing with lighter rescue loads. The maximum rope diameter that the Shunt can handle is 11 mm. The new Rescucender is NFPA 1983 T Rated and accepts rope diameters from 9-13 mm.

But as important as the ease of mounting/dismounting is, what I really like about the shunt, and now the new Rescucender is the fact that the shell and the shoe are no longer connected together with a light cable or a thin piece of fabric. I have a few pet peeves, and one of them is seeing rescuers strutting about with a two-piece cam hanging from their gear loop unassembled. The shoe is clipped but the shell is just flapping in the breeze hanging from that thin tether waiting to get jammed into a piece of the structure and break free from the shoe. And, if you don’t believe that happens, you haven’t been doing this long enough, or it may be that your team is really good about assembling their two-piece cams when storing or hanging them from their gear loops. So that whole problem of the shoe ending up in Kansas City while the shell is somewhere in Oshkosh is now eliminated with the introduction of the Rescucender.

The attachment hole in the cam arm is extra-large which allows for rotation of your connector. This doesn’t sound like that big of a deal, but once you start using equipment that allows rotation of the connector from end to end, you will appreciate it. 

Rescue Toolbox: Petzl RescucenderAs with any piece of rescue equipment, it is important to be properly trained in its use. The action for opening and closing the Rescucender becomes very intuitive in a short amount of time. The engagement and movement of the shoe along its guides oozes precision and the solid feel in your hand lends a high degree of confidence. The device is equipped with a spring that has a light action and is primarily intended to prevent fouling. Our experience is the cam runs rather freely down the rope in vertical applications when attached to a pulley. This provides the convenience of creating longer “throws” with a Z-rig or piggy-back hauling system. The balance between the spring action and the need for the cam to remain open in progress capture applications is spot on. It also has just enough passive camming action to remain in place without back-sliding during rope ascents. It runs free when you need it to, and then grabs the rope when needed.

We all know that the pin needs to be completely seated in most two-piece mechanical cams, the new Rescucender does not have a removable pin but instead has dual safety catches, one on each side of the body. Once the device is installed on the rope, it is important to check that there is no “red” of the visual indicators showing. You will feel and hear a distinct click when the safety catches engage. Additionally, the problem of installing the shoe the wrong way in the shell is now eliminated as the Rescucender does not allow 180 degree rotation of the shoe in relation to the shell.

Rescue Toolbox: Petzl RescucenderI continue to be excited about the evolution of rescue equipment. It doesn’t seem that long ago that we moved from goldline ropes to kernmantle, but years would go by without seeing any major breakthroughs in modern equipment. Well, those days are over. It seems that the digital era, as well as the push from various agencies and users, combined with the “out-of-the-box” thinking of equipment designers is driving the rapid emergence of better and better rescue mousetraps.
It’s a good time to be in rescue, it always has been, but the versatility, precision, and safety of modern equipment sure makes our tasks easier today than ever before.

Article by Pat Furr, Safety Officer & VPP Coordinator for Roco Rescue, Inc.
Pictures courtesy of Petzl

Calculating Compound M/A

Tuesday, June 13, 2017

Calculating Compound M/AWe recently had a request for additional information beyond what was shown in our “Theory of Mechanical Advantage” video by Chief Instructor Dennis O'Connell. The reader would like to know more about calculating compound mechanical advantages.

First of all, a simple mechanical advantage (MA) is quite easy to calculate as long as you follow a couple of basic rules.

MAs are generally expressed in numeric ratios such as 2:1, 3:1, 4:1, etc. The second digit of the ratio, or the constant "1" represents the load weight. The first digit, or the variable 2, 3, 4, etc. represents the theoretical factor that we divide the load weight by, or inversely multiply the force we apply to the haul line.

I say theoretical as these calculations do not take into account frictional losses at the pulleys and resistance to bend as the rope wraps around the pulley tread. So a 3:1 mechanical advantage would make the weight of a 100-pound load feel like 33 pounds at the haul line, but we do lose some advantage due to those frictional losses. An even more important consideration is the fact that we multiply our hauling effort by the variable, which is important to understand when we think about the victim or an on-line rescuer that has become fouled in the structure. This is also important when considering the stresses on the haul system including the anchor, rope, and all components in the system.

We also need to pay attention to the amount of rope that must be hauled through the system to move the load a given distance. If we are using a 4:1 MA and need to move the load 25 feet, we need to pull 100 feet of rope through the system (4 X 25 feet = 100 feet).

To calculate a simple MA, remember this: if the anchor knot is at the load, it will be an odd mechanical advantage (3:1, 5:1, 7:1, etc.). If the anchor knot is at the anchor, it will be even (2:1, 4:1, 6:1, etc.) “even/anchor-odd/load.” And if you count the number of lines coming directly from the load, you will determine the variable (remember not to count the haul line if it passes one final change of direction pulley). For instance, if the knot is at the anchor and there are four lines coming from the load, this will result in a 4:1 simple MA. And if your haul line is being pulled away from the anchor, that only means you have created one final change of direction which oftentimes is done to allow the addition of a progress capture device (ratchet), or simply to make it a more convenient direction of pull. But this 5th line, called the haul line, does not come directly from the load. It comes from the final directional pulley to the haul team and is not to be counted in the simple MA ratio. We would call this set up a 4:1 MA with a change of direction (CD).

Calculating Compound M/A

Calculating compound MAs is also quite easy. Compound MAs (sometimes called a stacked MA) simply means we are attaching a second MA to the haul line of the original MA. When we do so, we multiply the first digit of the original MA by the first digit of the second MA. If you attach a 2:1 MA to the haul line of a 4:1 MA (2 X 4 = 8), you end up with an 8:1 compound MA. Keep in mind that we have added even more frictional losses into this system, but it is still a pretty powerful MA.

There are potential benefits as well as potential penalties when using compound MAs. One benefit includes using less gear when stacking MAs. For instance, to build a simple 6:1 MA, you will require at least five pulleys, and if you want a final CD, that would require one last pulley for a total of six pulleys. If you decide to build a 6:1 compound MA, you can get away with as few as three pulleys by attaching a 2:1 MA to the haul line of a 3:1 MA. If you wanted one final CD, you would again add one more pulley for a total of four pulleys. The obvious advantage is that fewer pulleys are required, but hidden in there as another advantage is fewer pulleys for the rope to wrap which translates to less frictional loss and bend resistance.

Another benefit to stacking MAs may be the reach you need to attach to the load. If the load is 25 feet away from the anchor and you are using a 6:1 simple MA, you will need at least 150 feet of rope, plus some extra to tie the anchor knot, and some spare to wrap over the final directional - if you use one. If the load is 50 feet below the anchor and you want to stick with the simple 6:1 MA, you are looking at a minimum of 300 feet of rope.

So, what if we send a 3:1 MA down from the anchor to the load 25 feet below and attach a 2:1 to the haul line of the original 3:1 to build a 6:1 compound MA?

Well, in this case we would need 75 feet of rope plus some extra for knots for the original 3:1, and two times the length of the compounding MA throw. Throw? What the heck is throw? Throw is a term we use when we have a limited distance between the compounding MA anchor and where we can safely attach the compounding MA to the haul line of the original MA.

In the diagram below you can see the original 3:1 MA extending from its anchor to the load. The added MA, which in this case is a 2:1 has a total throw of 10 feet which requires a little over 20 feet of rope to construct. So, if we add the 75+ feet of rope required for the original 3:1 to the 20+ feet for the added 2:1, we arrive at a bit over 95 feet of rope required for this compound 6:1 MA to reach a load 25 feet from the anchor. This can be two separate ropes, one a bit over 75 feet and a second a bit over 20 feet, or it can be one rope a bit over 95 feet that we can treat as if they were two separate ropes. More on that in a bit.

Calculating Compound M/A

Remember that we must consider the amount of rope that we need to pull through the system in order to move our load the required distance. So, using a 6:1 compound MA to move the load 25 feet we must pull a total of 150 feet of rope through the system. Whoa, wait a minute! I thought we determined that our total rope needs were only a bit over 95 feet, so how did we come up with 150 feet of rope? One of the disadvantages of compound MAs is the need for resets when the throw is not long enough to move the load the needed distance. So, even though we are using in the neighborhood of 95 feet of total rope, we are pulling the same section of rope through the second MA multiple times.

Well, this is one of the big disadvantages of a compound MA. We need to reset the system multiple times to move the load the required distance. To help envision a reset cycle, let’s assume we have our original 3:1 mounted to an anchor, and 25 feet from that anchor is the 3:1 attached to the load. The haul line of the original 3:1 goes through a final CD, and we have attached a ratchet at that final CD to capture the progress of the loads movement. One option is to find a second anchor and in this case we found one 10 feet away from the final CD of the 3:1. We tie an anchor knot and attach it to that second anchor and route the remaining 20+ feet of rope through a pulley which we attach to the haul line of the original 3:1 with a rope grab. We now have our 2:1 pulling on the haul line of a 3:1 resulting in a 6:1 compound MA.  But…… and there’s always a “but,” isn’t there? We can only move the load a bit over 3 feet at a time before we completely collapse the 2:1 and need to reset it for the next haul. Remember, the 2:1 only has a 10-foot travel or “throw” and that distance is divided by 3 as it is pulling on a 3:1 MA. In addition to that, we have pulled about 20 feet of rope through the 2:1 just to move the load a bit over 3 feet. In order to move the load the entire 25 feet we will need to reset the system about 8 times and that is some slow going. Just to point out one option to speed up the haul by reducing the amount of resets needed, if you sent the original MA to the victim as a 2:1 and then stacked a 3:1 MA with 10 feet of throw onto that 2:1, you would still have your compound 6:1 but would only need to do about 5 resets and could do it with a bit over 80 feet of rope.


Calculating Compound M/A

There are all sorts of options when deciding what type and ratio of MA to use in a rescue effort. You can get pretty creative when building MAs, but be aware that creativity can sometimes lead to crazy. Remember the KISS principle…keep it simple and safe.

If you are overbuilding an MA just to show a cooler way of doing it, you may be missing the point of the job. There is someone in trouble that is relying on you getting them up and out of their predicament, and sometimes we can get a little carried away with our creativity, especially when it comes to MAs. 3:1 Z-rigs are a great option especially with the addition of devices like the Petzl ID or the CMC MPD as your first MA change of direction and progress capture device. Plus, this gives you the ability to convert to a lower with friction control already built in. But you can really complicate things by compounding a second MA onto a Z-rig to get a higher ratio MA. You will soon learn that now you have to perform two separate resets of the haul cams. And, if you are out of sequence in the reset, the haul cam of the second MA will jam into the traveling pulley of that system and stop you in your tracks. There are some tricks to really make the resets for this system go nicely, but that will have to wait for another day.

Calculating Compound M/A

There are hundreds of variations that you can use for compounding MAs, but once again I caution you to remember KISS. I have my favorites and every once in a while the situation calls for something a little different, and that’s where understanding the advantages and disadvantages of the systems is of great value.

For additional video resources on mechanical advantage as well as other techniques and systems, visit Roco Resources.

Roco Competent Person Equipment Inspection

Wednesday, February 15, 2017
Roco Competent Person Equipment Inspection

Does a competent person inspect your rescue equipment each year?

If not, you may want to consider having an independent third party perform the inspection for you. This service is offered by Roco as a stand-alone service, or it can be added to your next private training session. 

Functional Ops Check

The service includes a “sight and touch” functional inspection of hardware, nylon products (including rope, webbing, and anchoring components), harnesses, and accessory equipment (including litters and stretchers) utilized in confined space/high angle applications. The inspection will be conducted in accordance with manufacturer’s specifications and will satisfy the requirement for an annual2 inspection by a competent person.
Note: Equipment recommendations will NOT be provided by inspection personnel unless requested to do so.

Service Inspection Benefits include:

Roco Competent Person Equipment Inspection

• Certified personnel to inspect equipment to manufacturer's standards.
• Inspection documentation from an independent third party.
• Frees your personnel from the responsibility of equipment inspections.

A full report of findings will be provided to include accessibility of equipment to responders and any other recommendations to improve overall team performance. It will include other pertinent information such as the manufacturer, product number, and serial/lot number (where applicable), date of manufacture, and in-service date (when available). It will also include the results of pass/fail testing for both visual and functional inspection. All equipment deemed unsuitable for use will be tagged for removal from service.

Regardless of the stated service life, the condition of equipment – as determined through inspection by a qualified party – is a key factor in determining whether or not a piece of equipment is fit for service.

Although the definition of “equipment lifespan” is very broad depending on the manufacturer, each provides specific instructions on proper inspection of equipment and detailed explanations on when to retire the service item. Several general identifiers that pertain to all equipment are shown below.

Reasons for Equipment Retirement include:

• Item fails to pass any pre/post use or competent person inspection.
• Item has been subjected to a major fall or load.
• Item is constructed of plastic or textile material and is older than 10 years.
• You cannot determine the complete full-use history of item.
• You are not certain or have lost confidence in the equipment.

As a reminder, it is very important to keep the manufacturer’s instructions when purchasing new equipment. This is vital to identifying and keeping track of the manufacture date as well as other important information. For example, if the manufacture date of equipment, such as life safety rope and harnesses, cannot be identified; it can pose extreme liability for agencies or facilities whose teams may potentially be operating with equipment that has passed its service life. It could also create a compromise in the safe operation of the equipment.

A 10-year service life for nylon/polyester products is set according to ASTM F1740-96 (American Society for Testing and Materials).

Inspect Rescue Equipment Every Time It’s Used

All team members should be qualified and knowledgeable enough to perform pre- and post-use inspections of equipment. It is crucial that all members document each use of equipment, denote any deficiencies, and report to the proper person. One person should be designated to perform the competent person annual inspection. This person should have complete knowledge of the equipment and inspection procedures as well as the authority to keep or remove equipment from service as they see fit. If team members are unable to fill this role, a qualified third party with applicable manufacturer certifications in competent person inspection should be utilized to assist in determining the condition and estimated service life of rescue equipment.

Download Roco's Quick Checklist for your convenience. →

Rescue team members are encouraged to attend this inspection where they will receive information on proper pre- and post-use inspections for their equipment. Guidance can be also offered in areas of equipment care, inspection, record-keeping, and proper storage. Again, equipment recommendations will not be addressed unless specifically asked to do so – this is only an inspection of the equipment you currently have on site.

Remember, with rescue gear, lives are literally “on the line,” – if in doubt, throw it out!

To schedule your Roco Competent Person Inspection, or add it to your current training dates, call us at 800-647-7626 or email info@rocorescue.com. Roco offers this service at no charge for current customers or for a very nominal fee for non-customers.1

1 Current customers receive a one-day equipment inspection at no charge. Travel expenses apply for out-of-town customers.

2 References include: 1926.502 Appendix C; ANSI Z359.2 Section 5.5.2 Inspections; ASTM Rope Inspection Guide; NFPA 1983 Section 5.2; ANSI Z359.11 Annex A (harnesses); and ANSI Z359.4 Section 6.1.

NOTICE: The client remains responsible for ensuring that all guidelines and requirements for maintaining and, where indicated, removal of equipment from service, are followed. This includes removing equipment from service anytime there is a situation or incident that occurs during handling, training, or rescue, that might have caused damage or otherwise compromised the integrity of the equipment, particularly where internal damage that is not visible might be present (e.g. equipment dropped from height, exposure of nylon products to chemicals or other potentially degrading substances, etc.). Client will be required to complete a certification that between Roco inspections, the equipment was properly stored, was available only to personnel trained to use the equipment properly, and that any equipment that was exposed to any condition or occurrence that could have resulted in hidden damage has been removed from service. A company representative, preferably someone from the rescue team, must be present during the inspection process.

RescueTalk™ (RocoRescue.com) has been created as a free resource for sharing insightful information, news, views and commentary for our students and others who are interested in technical rope rescue. Therefore, we make no representations as to accuracy, completeness, or suitability of any information and are not liable for any errors, omissions, or delays in this information or any losses, injuries, or damages arising from its display or use. All information is provided on an as-is basis. Users and readers are 100% responsible for their own actions in every situation. Information presented on this website in no way replaces proper training!