Roco is excited to be conducting several Rescue & Fall Protection Workshops at the 44th Annual Safety Conference next month in Bismarck, ND. This will kick off our working relationship with the ND Safety Council to provide safe, effective confined space rescue training for their membership.
What's more, the North Dakota Safety Council (NDSC) is currently constructing a new safety campus in Bismarck that will house a 5,000 square foot hands-on training lab. Roco, as a training partner, will provide high-level technical rescue courses at this new facility on a year-round basis.
For the conference on February 20-23, we will be conducting a number of hands-on rescue workshops and presentations to be presented by Roco Lead Instructors Dennis O’Connell, Pat Furr, Brad Warr, Eddie Chapa and Josh Hill. Sessions include:
- Intro to Competent Person Requirements for Fall Protection
2/20 9am-6pm (classroom w/demo) - Confined Space Entrant, Attendant, and Supervisor Requirements
2/20 9am-6pm (classroom w/demos) - Tripod Operations
2/21 11am-5pm (hands-on training) - So You’ve Fallen, Now What?
2/22 10am-11:30am (classroom) - Dial 911 for Confined Space Rescue
2/22 1:30pm-2:30pm (classroom w/demos) - Confined Space and Rope Rescue...
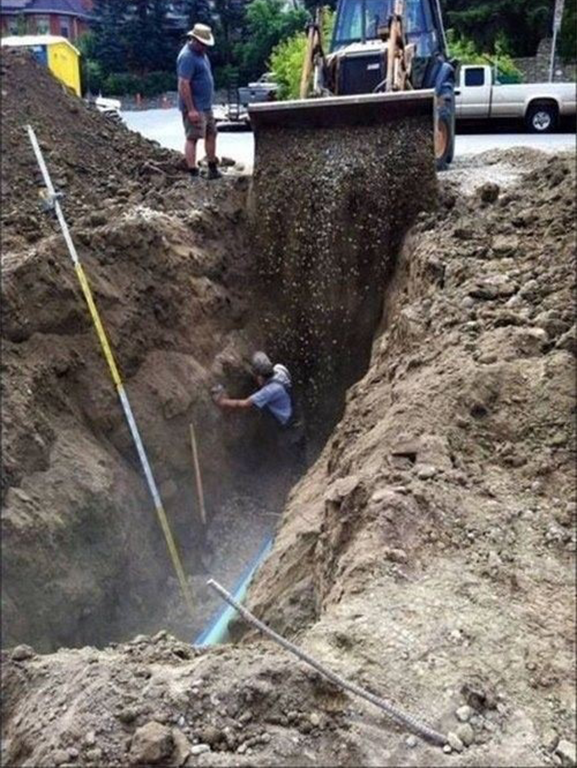
2/22 1:30pm-5pm (hands-on training) - Trench Collapse Rescue Considerations
2/22 2:45pm-3:45pm (classroom) - Fallen/Suspended Worker Rescue
2/23 8am-11:15am (classroom w/demos) - We look forward to meeting you at Roco booths (#202 & #203) or in these training sessions. For more info, click to NDSC’s 44th Annual Safety & Health Conference. Don't forget to register online at www.ndsc.org for these training sessions.
 KEY LARGO, Fla. - Three workers in the Florida Keys died Monday morning (Jan 16) after they were overcome by fumes, authorities said. Miami-Dade Fire Rescue officials said they responded to reports of three people down. The victims were working at a road project.
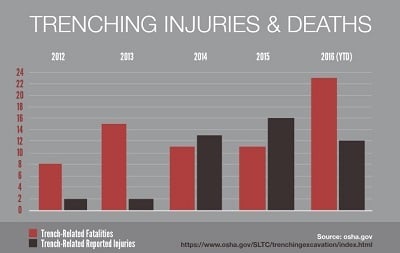
 The new OSHA statistics show in 2016, we have two people a month dying in trenches, which is double the amounts for 2014 & 2015. Why, is the soil getting more dangerous? I can only speak to what I have seen in trends in industry that may be contributing to this rise. In previous articles, I have discussed the subject of trench and trench rescue and some of the following concerns:
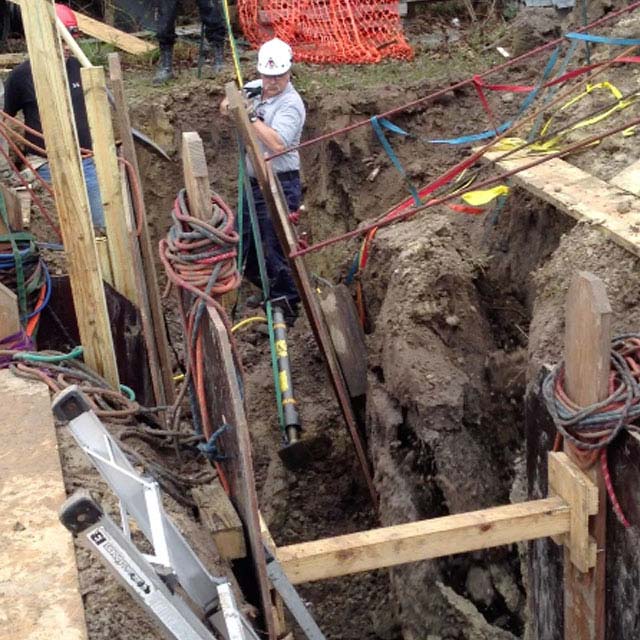
 By Pat Furr, Safety Officer & VPP Coordinator for Roco Rescue, Inc.
 Whenever we tie a knot in a line we lose some of the efficiency in the rope or webbing we are using. Generally, the more acute the first bend in the knot, the more efficiency is lost.

 Many rescue scenes (and teams) are plagued by confusion because of too much communication. And, if you have three people assigned to do a task, each one will have his or her own idea of how it should be done, where the system should be anchored, etc. Many times the discussion that follows eats up valuable time and slows the team’s ability to get rescuers into a location and get hands on the patient.